Introduction:
As a productivity tool, Stable Diffusion will definitely be widely used in the future. Although Stable Diffusion has a web version, it has the following disadvantages:
- The web version is mainly a demo type, and there are not many raw materials to choose from, and the text to imaging effect is not good.
- The web version is used by many people and may occasionally lag.
- The current web version is free, but it is difficult to guarantee that it will not be charged in the future or audited the prompt words.
Using nConnect to connect to your own computing terminal for AI drawing has many advantages:
- The computing power is for personal use, and suitable graphics cards can be selected according to the needs to achieve optimal cost, and there is no need to carry them with you, and you can use them anytime, anywhere.
- AI training methods, keywords, etc. will become confidential information or intellectual property rights in the future. Distributed networks can better protect your AI training results and intellectual property rights.
- In the future, the review of sensitive words can only be avoided on the machine you build.
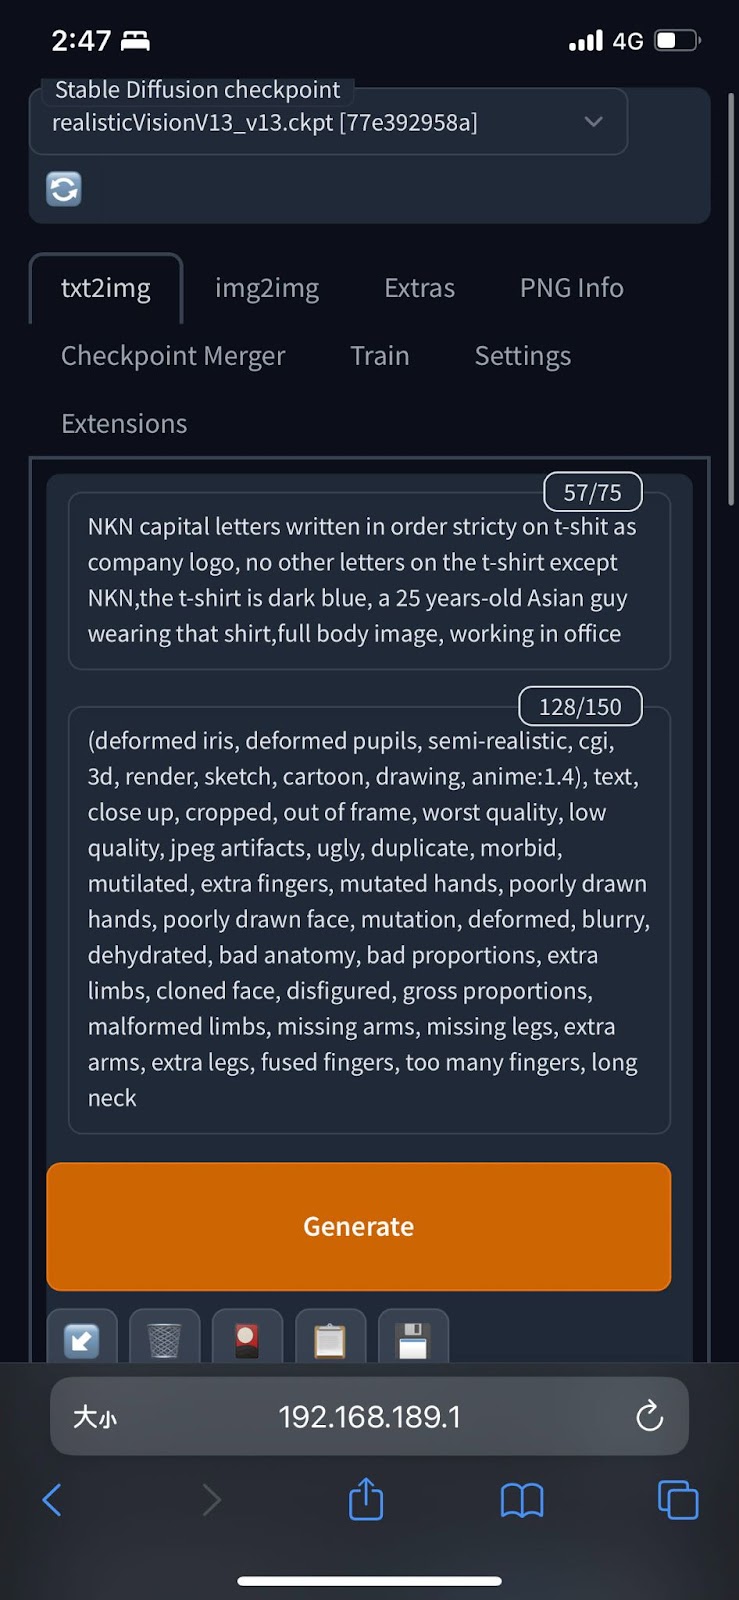
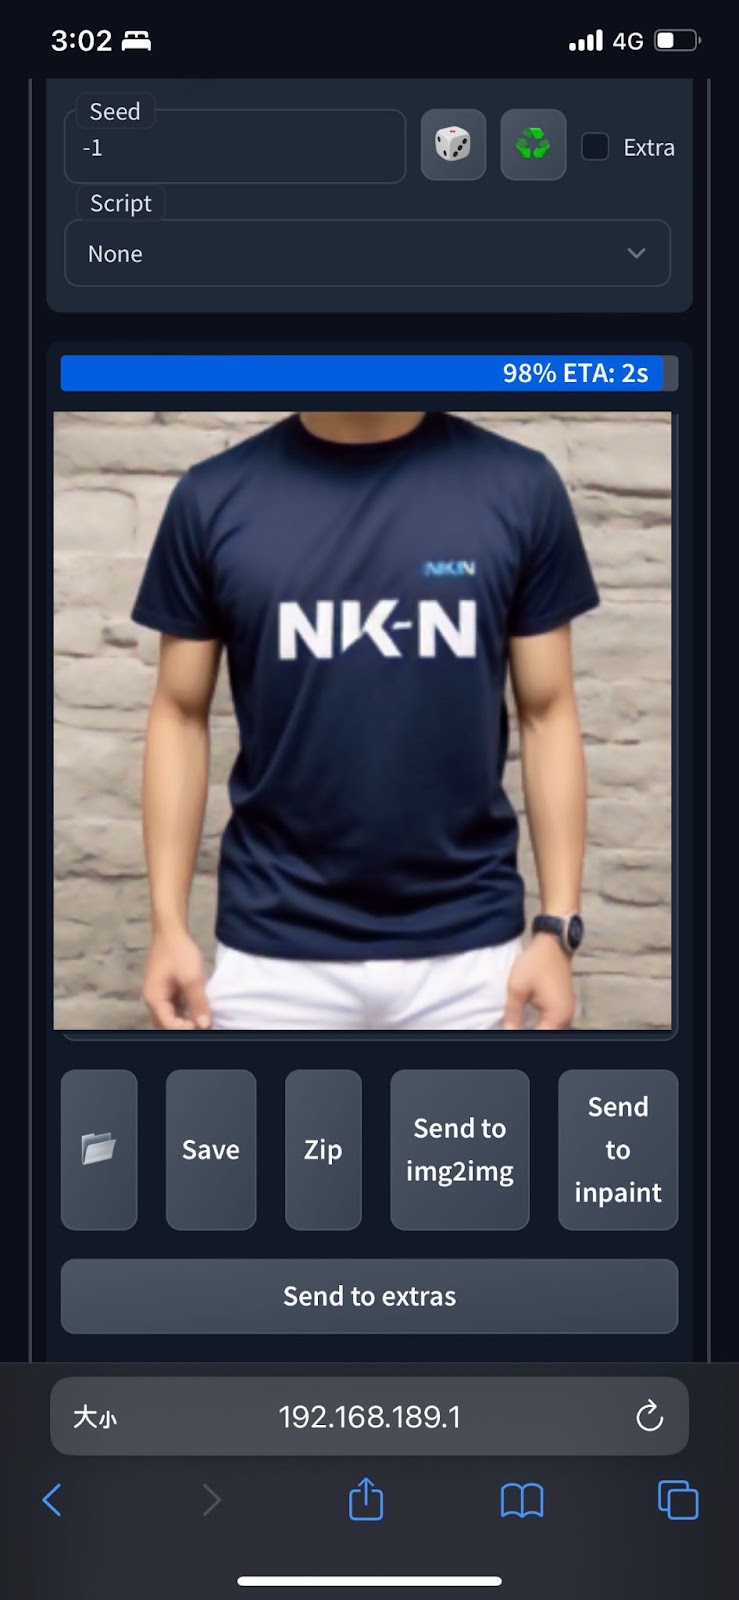
Here is a demo generated by AI created by the NKN team. Please take a look at the effect picture: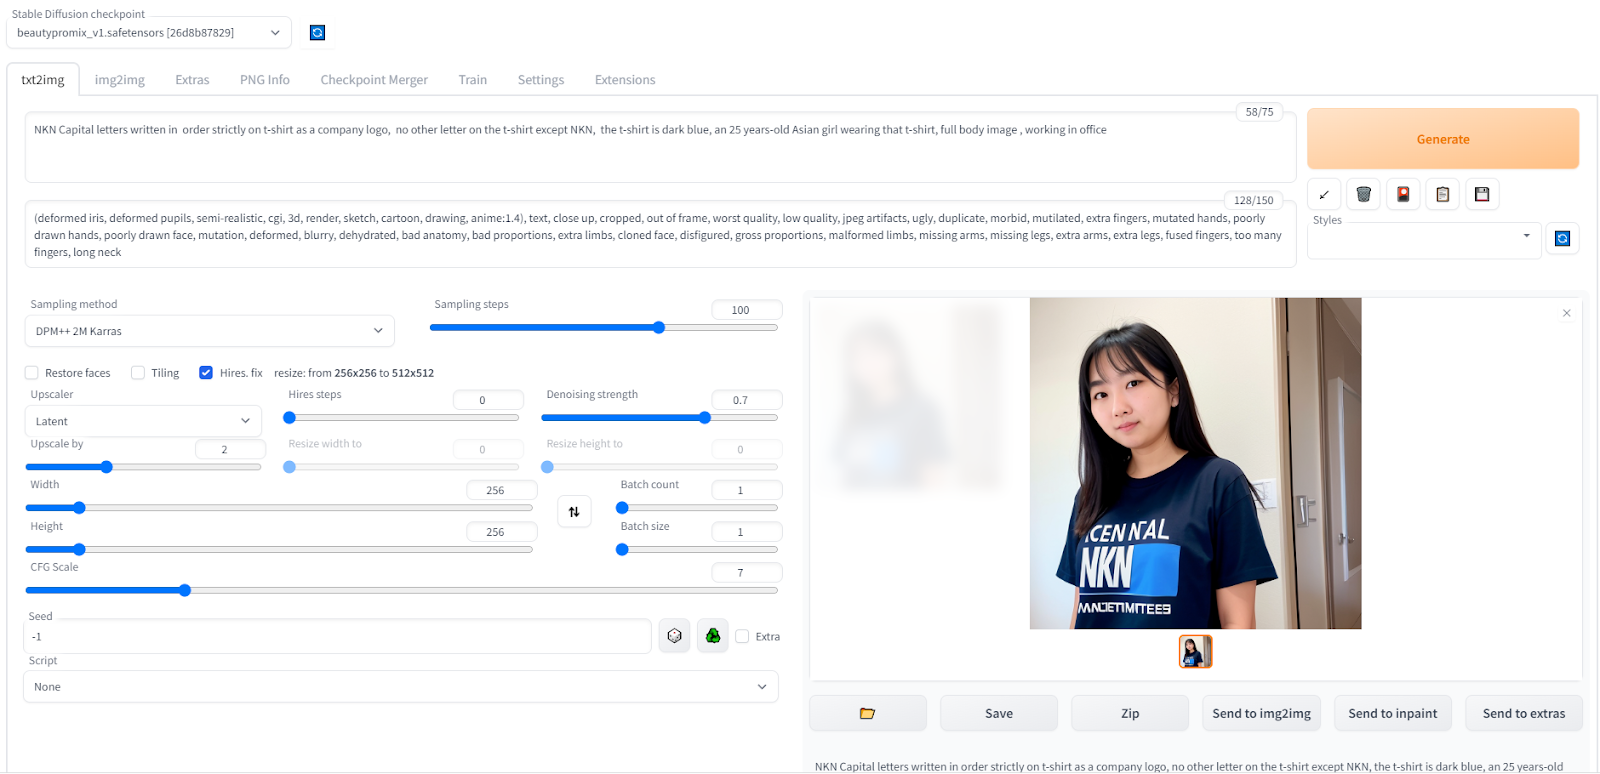
“Even in a 4G environment on a mobile phone, you can use an internal IP address to connect to the computing terminal for generation.”
Concept:
The AI drawing software (taking Stable Diffusion as an example) is an open-source software that you can download from Github and run on your local machine. The software also provides an IP access way, which allows you to access it directly from the public network if you have a public IP address. However, this method requires you to apply for a public IP. However; your intellectual property will be exposed to the public network. On the other hand, using NKN’s nConnect, as mentioned in the introduction, you don’t need to expose any of your information and you don’t need to have a public IP. You can safely and quickly use this software in your own environment.
Operating steps:
Generally, the operation can be divided into two steps:
- Establishing access between your local machine and the public network (mapping the internal network environment to the public network), which needs to be fulfilled through nConnect.
- Installing the AI drawing software (taking Stable Diffusion as an example) on the computing terminal (usually a computer or server with a high computing power graphics card).
A. Establishing access between your local machine and the public network:
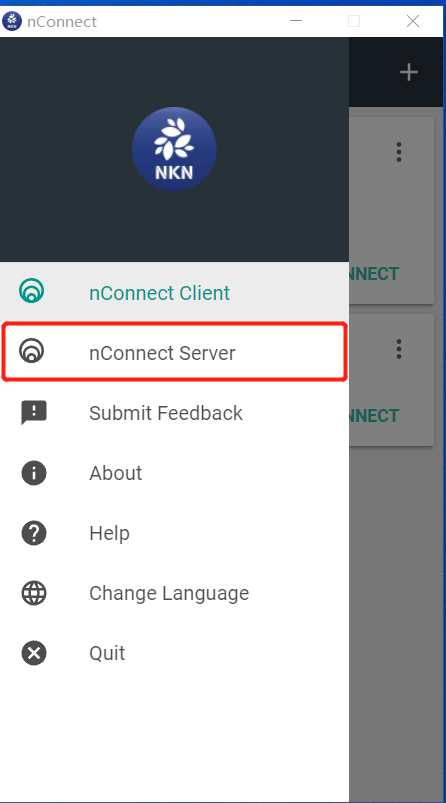
- Install the nConnect server-side and client-side through the official link.(https://nkn.org/products/nconnect/)
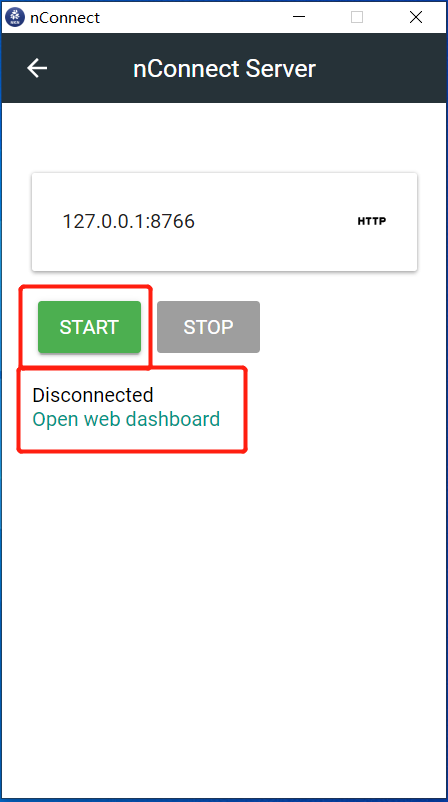
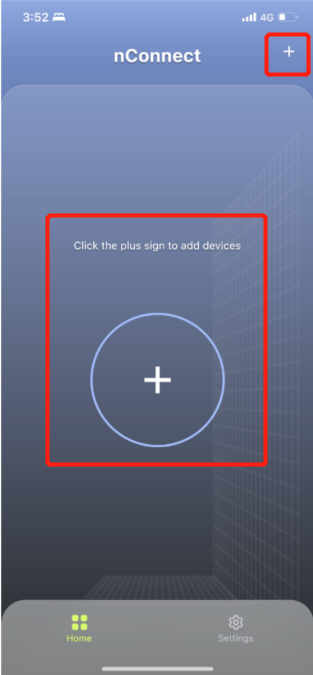
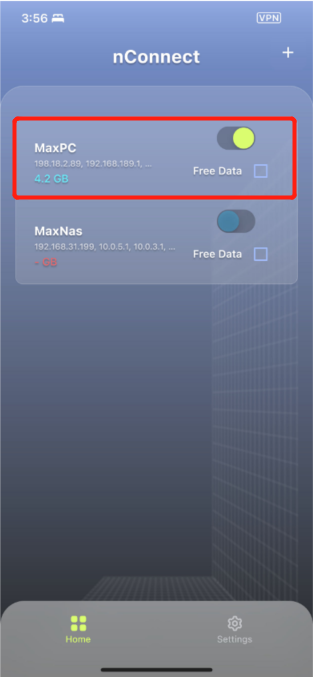
- After installation, click on the nConnect Server and click “start”. Wait for the status to change to “Connected”. Then click on “Open web dashboard”.
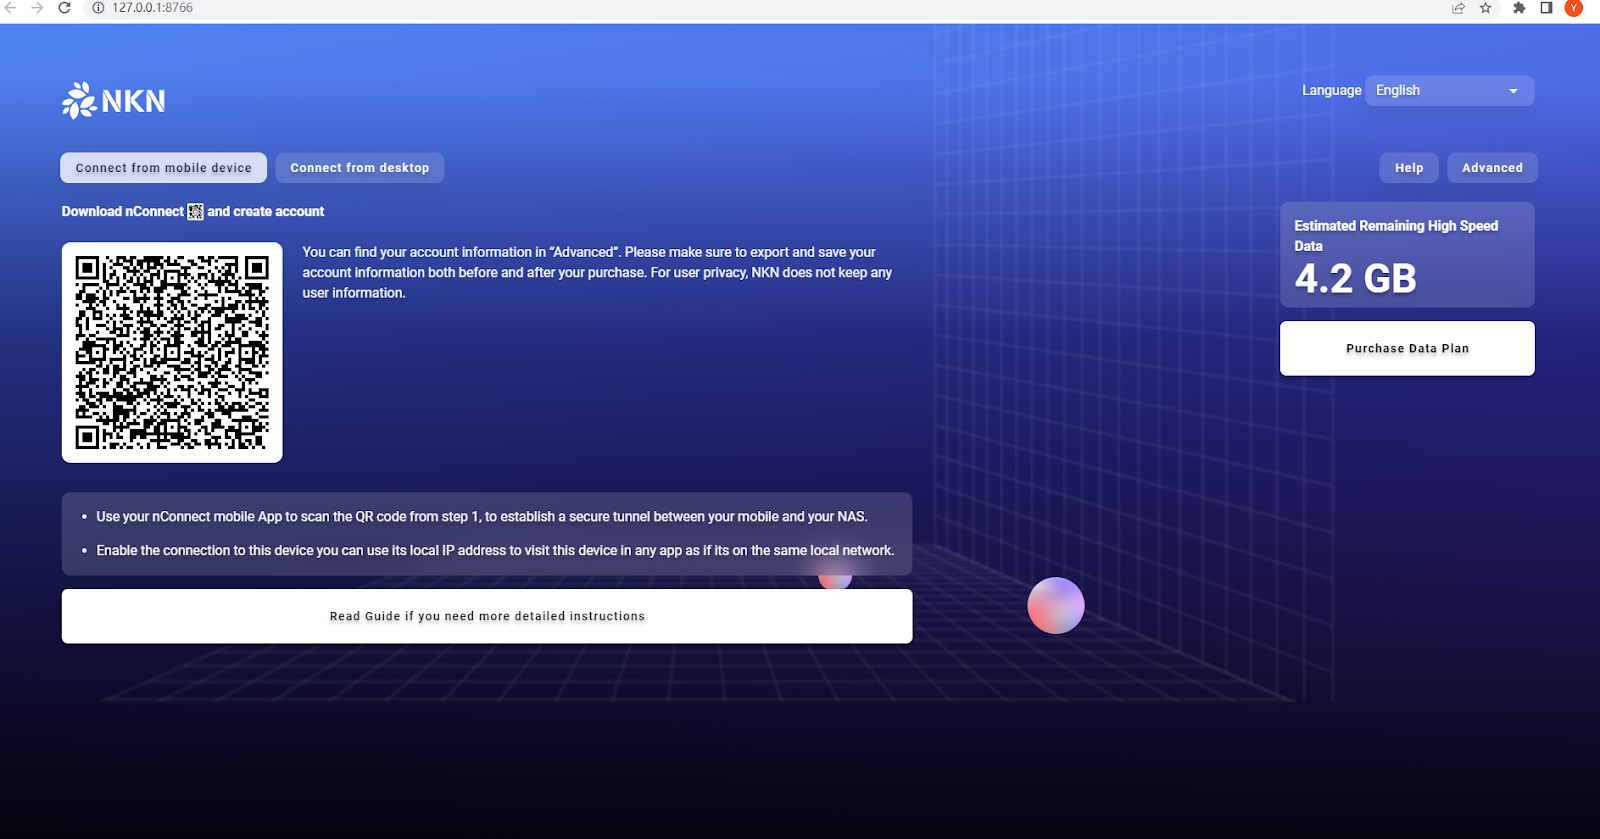
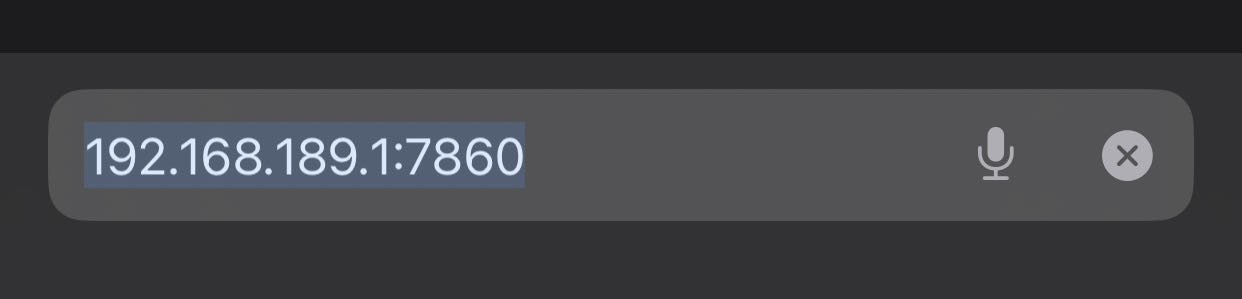
- After opening the nConnect web page, use the scan function on your mobile phone (the icon in the middle or the icon in the upper right corner) to link and synchronize the configuration.
(Web)
(mobile)
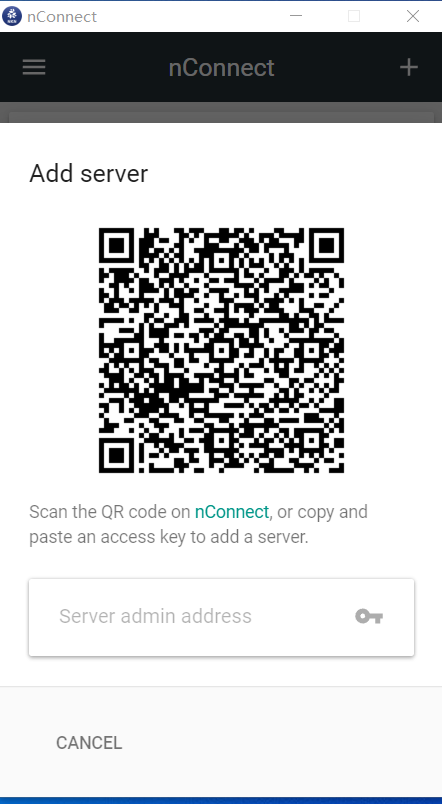
(On the PC side, click on the upper right corner to display the QR code. Then use your mobile phone to scan the code and synchronize the settings.)
- If you have already installed Stable Diffusion, you can modify the webui-user.bat file (shown in Figure 1) to make it accessible via IP (set COMMANDLINE_ARGS= --listen, as shown in Figure 2). If you haven’t installed it yet, please skip to step B to install Stable Diffusion first and then come back to this step.
After successful modification, the startup URL address will change from http://127.0.0.1:7860 to http://0.0.0.0:7860.
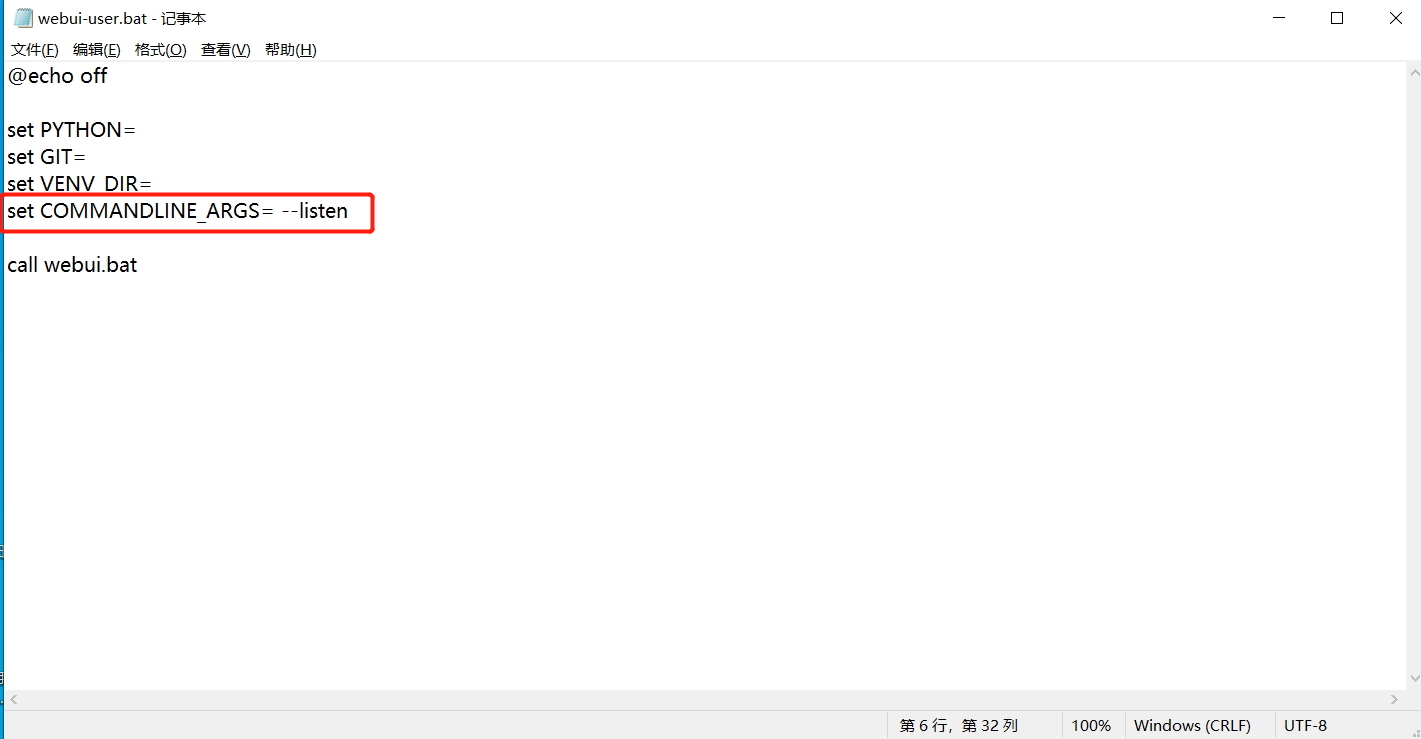
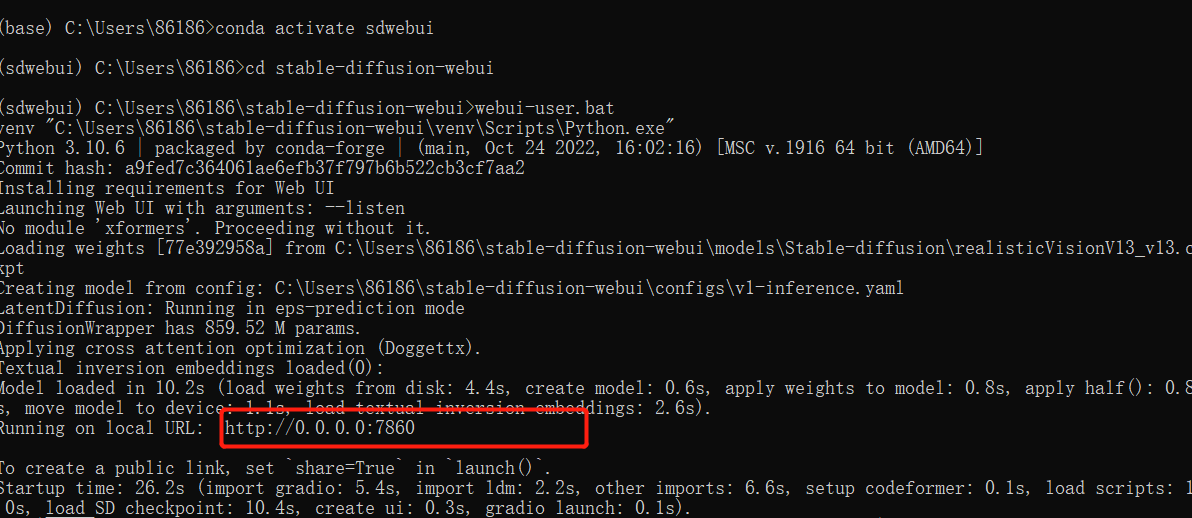
- After successful modification, the startup URL address will change from http://127.0.0.1:7860 to http://0.0.0.0:7860.
After establishing the connection, you can enter the internal IP address provided by nConnect and the port number provided by Stable Diffusion (usually 7860, X.X.X.X:7860) into your browser to directly access your self-built AI drawing terminal from the external network.
B. Installing the AI drawing software:
The installation steps are copied directly from:
- Download miniconda to configure the basic compiling environment.
This is used to manage Python versions and can achieve multiple versions switching of Python.
Download link:
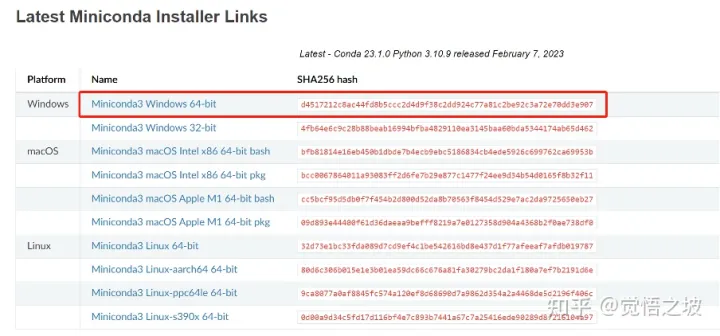
(miniconda download screenshot)
When installing, just keep clicking “next” using the default options.
- Open minicoda
(Start - type “mini” - find and open “miniconda3”)
Entering
conda -V
The appearance of the version number indicates successful installation.
-
In the miniconda terminal, execute the following command:
conda config --set show_channel_urls yes
Then enter
conda clean -i
to clear the index cache.
-
Create a Python 3.10.6 environment named “sdwebui” by running the following command: (Note: make sure your network connection is stable, otherwise errors may occur. Try running the command multiple times if necessary.)
conda create --name sdwebui python=3.10.6
When prompted to continue the installation, type “y” and press Enter.
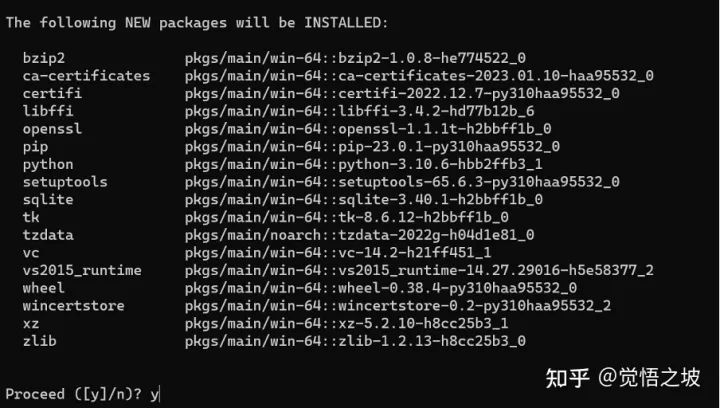
Once completed, you should see a message indicating that a new environment has been created in the directory “C:\ProgramData\Miniconda3\envs\sdwebui”.
-
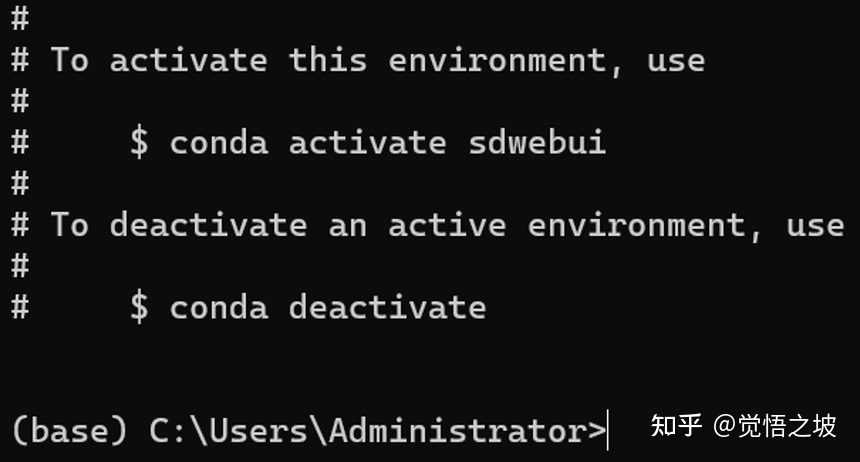
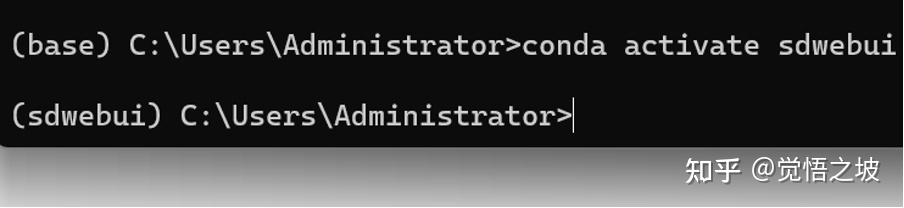
Activate the project environment by typing:
conda activate sdwebui
Enter
- Upgrade pip and change the default library package download address from the Tsinghua mirror site.
Execute the following two lines of code in order, enter each line and wait for the execution to complete.
python -m pip install --upgrade pip
pip config set global.index-url https://pypi.tuna.tsinghua.edu.cn/simple
If there is no error, it means it is completed. If there is an error, execute it several times until it is done.
- Installing git, which is used to clone and download GitHub projects, such as the Stable Diffusion WebUI project in this tutorial.
(1) Go to the official website of Git http://git-scm.com/download/win to download the installation package.
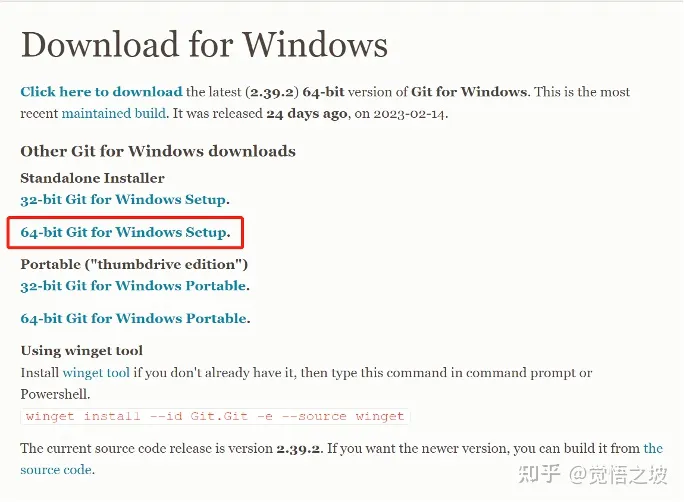
(2) Once downloaded, follow the default installation process and click “next” to proceed.
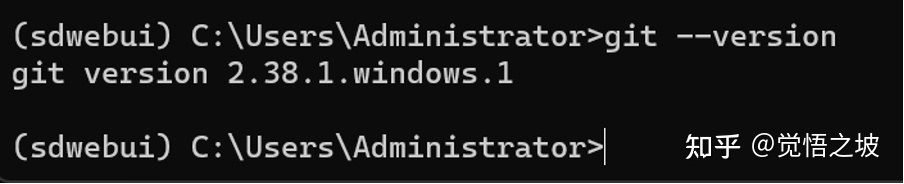
After the installation is complete, go back to the Miniconda terminal and enter the following command:
git --version
This will show the version of Git installed on your system.
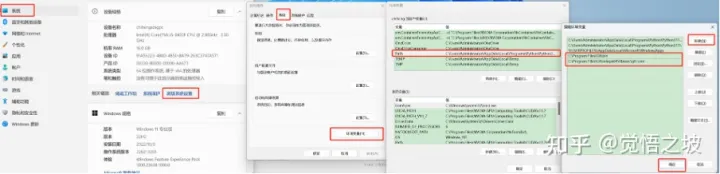
(3) If you receive an error message saying “‘git’ is not recognized as an internal or external command, operable program or batch file” and you do not see the version number, you will need to add the Git bin folder and Git-core folder address to the Windows system environment variable path.
The default Git bin folder is:
C:\Program Files\Git\bin
, and the default Git-core folder address is:
C:\Program Files\Git\mingw64\libexec\git-core.
Add these addresses to the Path environment variable by going to
Start > Settings > System > Advanced system settings > Environment Variables > Path > New.
After adding the addresses, go back to the Miniconda terminal and enter the following command:
git --version
This should now show the version number of Git.
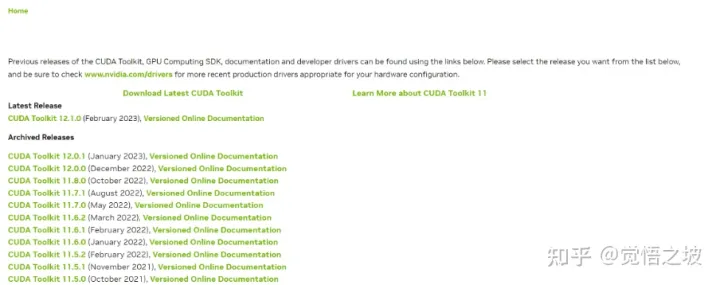
- Install CUDA.
CUDA is a dependency program used by NVIDIA graphics cards to run algorithms, so we need it.
Open the NVIDIA CUDA website, http://developer.nvidia.com/cuda-toolkit-archive
(If you cannot open the webpage, try using a VPN.)
You will find many versions of CUDA, but which one should you download?
Go back to the Miniconda prompt and enter:
Nvidia-smi
to check your CUDA version.
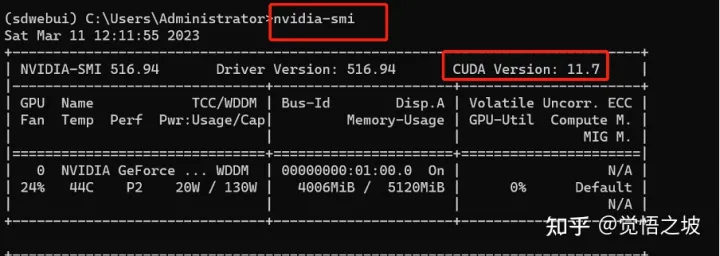
(When entering “nvidia-smi”, you may see the error message “‘nvidia’ is not recognized as an internal or external command, operable program or batch file”. In this case, make sure that you have an NVIDIA graphics card. If you do, check that your graphics card driver is up to date using software such as Driver Genius or Driver Booster. If updating the driver does not work, add C:\Program Files\NVIDIA Corporation\NVSMI to your system environment variables.)
For example, if my CUDA version is 11.7, I can download version 11.7.1.
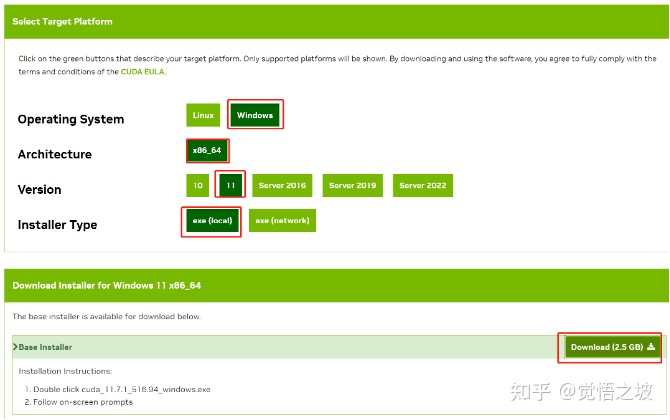
Download and install the version for your operating system, such as Windows 10 or 11, and select “exe local” and “download”.
After downloading, install the software. It is over 2GB in size and can be installed outside the C drive, such as the D drive, to save space on the system drive.
Now that you have finished setting up your computer’s basic environment, it’s time to start working on Stable Diffusion.
Stable Diffusion Setup:
Download the stable diffusion source code
Make sure that the Miniconda black window displays:
(sdwebui) C:\Users\Administrator>
This means you are in the sdwebui program environment.
Next, we need to install the stable-diffusion-webui. First, check where you want to install it. It is recommended to put it in the root directory of a non-system drive, preferably an SSD drive as it will load the model faster. For example, if you want to install it on the F drive, you should enter the following command and then press Enter:
F:

Next, execute the following command to clone the SD project code:
git clone https://github.com/AUTOMATIC1111/stable-diffusion-webui.git
Wait until the page displays “done”, then the cloning is complete.

Download the SD training model
Open https://huggingface.co/stabilityai/stable-diffusion-2-1/blob/main/v2-1_768-ema-pruned.ckpt
Click “download” to download the model. It is about 5.2 GB in size.
After downloading, place the training model v2-1_768-ema-pruned.ckpt in the models\Stable-diffusion folder.
(My folder is “F:\stable-diffusion-webui\models\Stable-diffusion”.)
Note:
(1) You may be prompted to register or agree to the agreement before downloading. If so, please register and agree.
(2) The models\Stable-diffusion folder is specifically used to store the basic model library for generating AI drawings. If you download a ckpt or safetensors file from other websites such as civitai, they should also be placed in this folder.
Prepare to run the AI drawing program sd-webui
In the Miniconda black window, execute the following command to enter the project folder:
cd stable-diffusion-webui
Execute the following command to open the webui application:
webui-user.bat
Next is to wait for the system to automatically execute.
Wait until the system prompts “running on local URL: http://127.0.0.1:7860”, which means you can start using AI to draw~
Note:
(1) This step requires downloading many dependent programs, and network fluctuations may cause errors. Therefore, it is normal to encounter errors multiple times during the installation process, and you need to be patient and try multiple times. Execute the webui-user.bat command multiple times.
(2) Do not close the black window, even if it does not change for several minutes or even 20 minutes. Wait until it reports an error before trying again.
(3) If an error message is prompted, it may be necessary to enable or disable the magic network and then execute the webui-user.bat command again.
(4) If you accidentally close the black window, reopen it by clicking: Start menu -> Programs -> Open Miniconda window, and then enter the following commands one by one:
conda activate sdwebui
F:
cd stable-diffusion-webui
Webui-user.bat
(Since I installed it on the F drive, I entered “F:”, but if you installed it on another drive, change it to the appropriate drive letter, such as “D:”, “E:”, etc.)
(5) If it hangs for a long time at the “Installing gfpgan” (or “installing clip”, “installing open_clip”) step, go to the F:\stable-diffusion-webui folder and open the launch.py file with Notepad.
Find the code block around line 200 to 300.

Modify the beginning of “https://github.com/xxx”, add “https://ghproxy.com/” in three places, so it becomes the following state:

Then save the file by pressing Ctrl + S and exit.
This is equivalent to changing the program package download from GitHub to a domestic mirror, which can increase network stability and speed.
After making the changes, continue to execute webui-user.bat.
(4) If you have modified the launch.py file and it still gets stuck at the gfpgan step, remember to disable the external network function and let the download go through the common route.
(5) After installing gfpgan, clip, open_clip and other major dependencies, there are still some automatically installed dependencies. If the installation is slow, remember to enable the external network. In general, if it feels slow or gives an error, switch to adjusting the network and then execute the webui-user.bat command again.
Open the webui web version
When the black window prompts “running on local URL: http://127.0.0.1:7860”, as shown below.
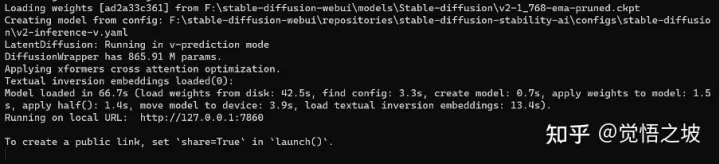
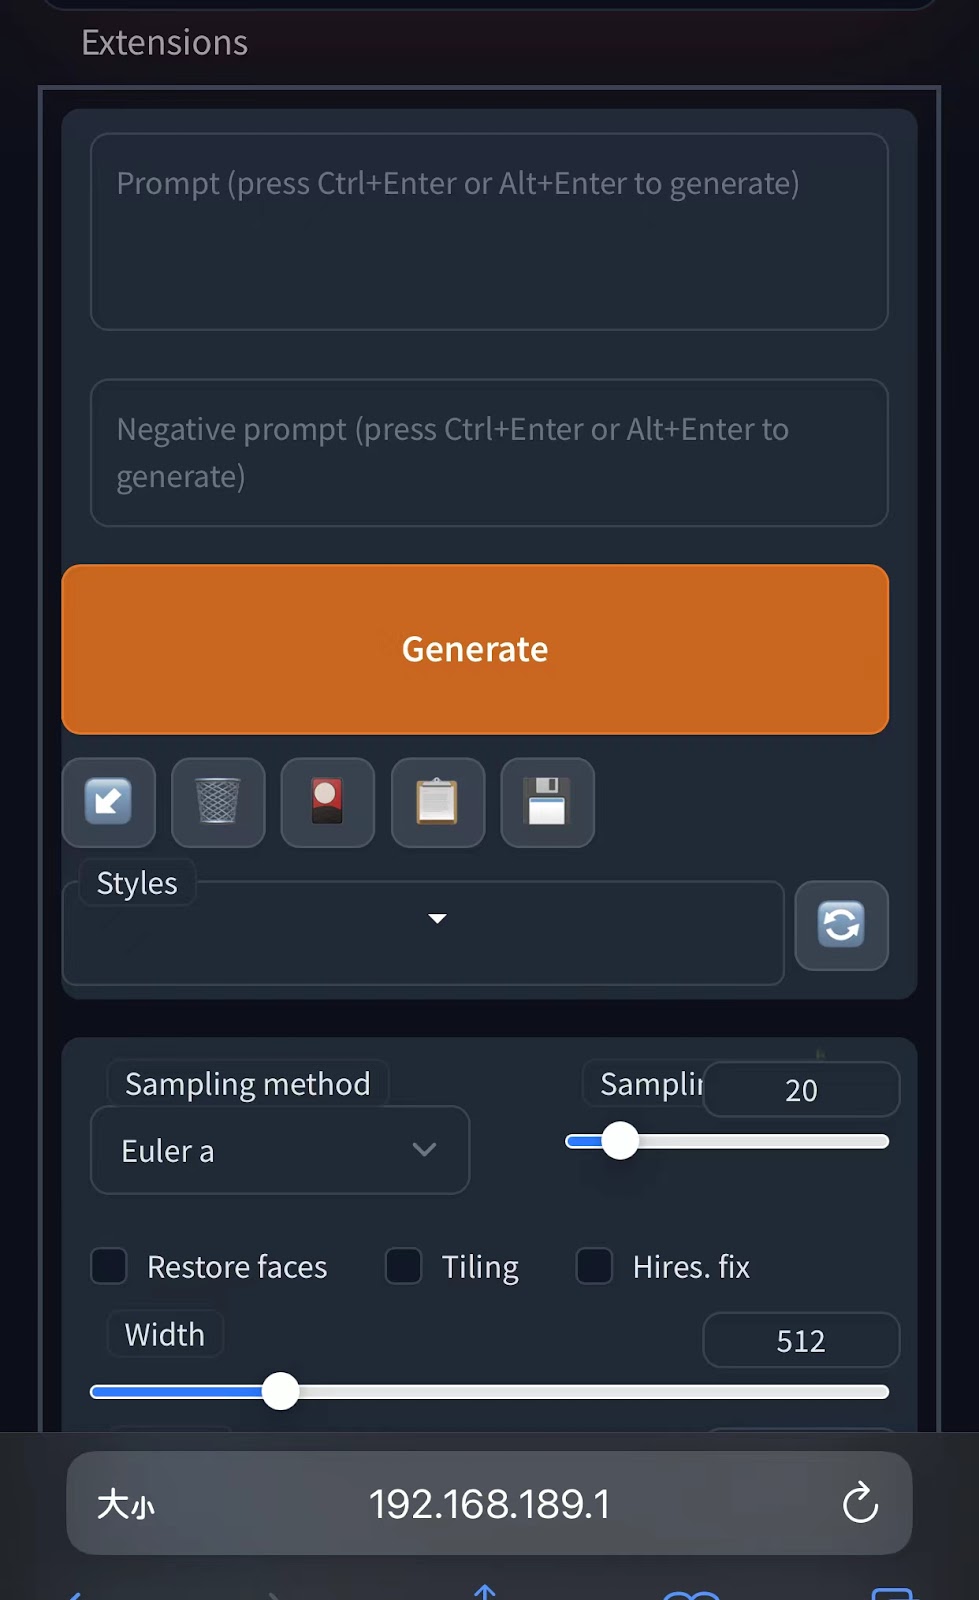
Do not close the black window, instead open http://127.0.0.1:7860 in a browser (such as Google Chrome), and the AI painting interface will appear.
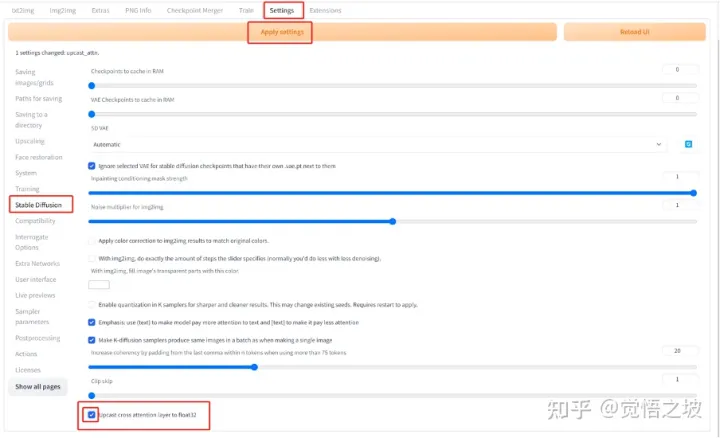
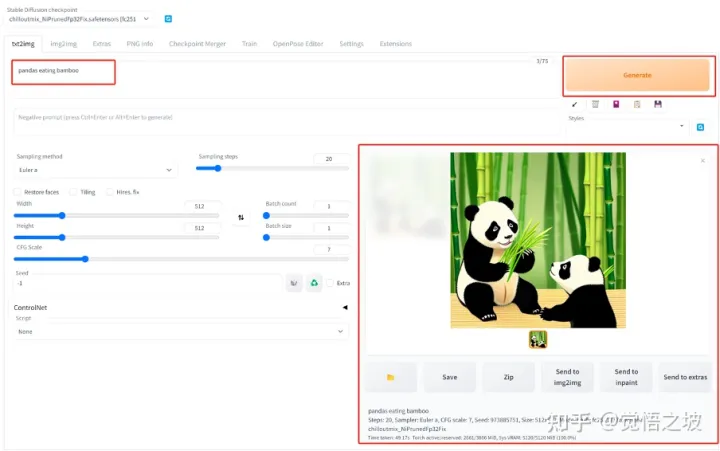
You can enter a prompt phrase in the text box at the top left, for example: “pandas eating bamboo”. Then, click the orange “Generate” button on the right. After a short while, you will be able to see the first image created by the AI.
(Note that if you write a prompt and click Generate but the image cannot be generated and a black box shows keywords such as “float 32”, then in the webui page, go to Settings-stable-diffusion at the bottom and check the float32 option box. Then click Apply Settings above, and after refreshing the page with F5, you can use it normally.)