
Hey everyone,
Today I want to show you how to set up a NKN Miner on your Windows 10 machine. For the ones who use Windows as their main operating system, read the official installation guide on https://github.com/nknorg/nkn and are not straight into “geeky-things” maybe got some serious problems running a node straight away. The reason is obvious: The guide was written for *nix machines like OSX and Linux, so you probably never heard about tools like “make”, “curl” or “git”. In my opinion it’s about time to introduce NKN to the most common OS in the world — don’t you think?
Okay, before we start let me give you a little bit of information about NKN in general:
What is NKN?
NKN (New Kind of Network) is probably the most exciting blockchain project in the year 2018. With NKN blockchainizing the whole network layer it reaches out to be the third pillar of internet structure besides computing and storageing.
In terms of mining that means that NKN tokens could be earned just by providing internet bandwidth to the network. On the contrary to many other tokens you don’t need any big server farms or masses of storage — just a network device with an OS and a little bit of configuration. The NKN mining introduction video is a very good point to get started:
Now what’s important to run a node? Obviously you don’t need much computing power and only some space for storing the NKN blockchain on your device — that’s just perfect for a little server with high bandwith!
What you’ll need
- A personal computer with windows 10 — nothing more!
Installation
Installing a NKN Node on Windows 10 is easier as you would think. Just finish the following 5 steps and you’re able to run your own node. There are no dependencies or libraries to install. Just download some files, do some terminal action and you’re done.
Everything’s set? Well then let’s grab a coffee and get to work!
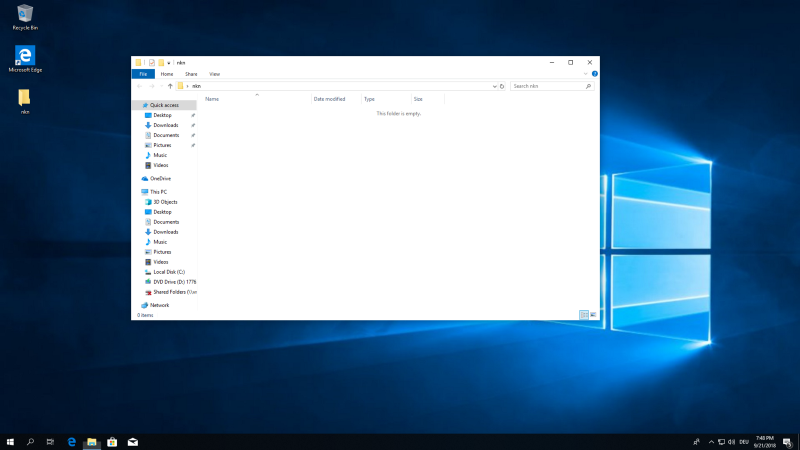
1. Create your NKN folder
We start by going through the easiest step of the tutorial: Just create a new folder anywhere on your local drive and name it as you like. In my case I created a new folder called “nkn” in my user’s directory.
2. Download latest release of NKN
Open up your browser and head to https://github.com/nknorg/nkn/releases. Scroll down and look out for the windows versions — there are two of them. Choose the one that is suitable for your operating system. If you’ve got a 64-bit machine choose the “amd64”-zip, otherwise the “386”-version is right for you.
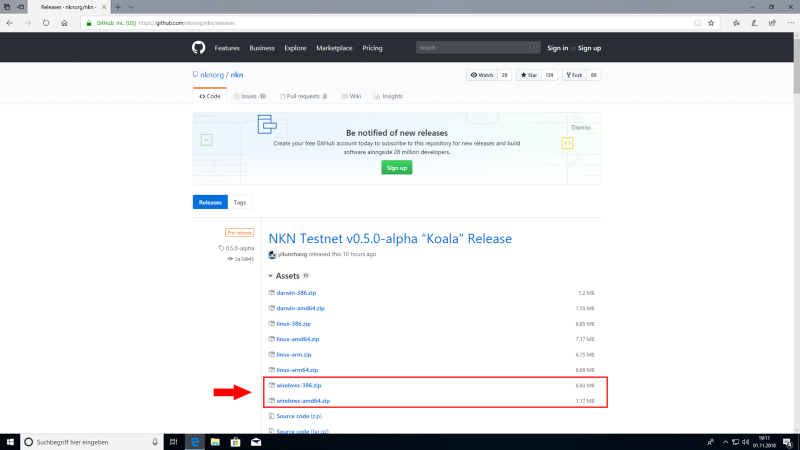
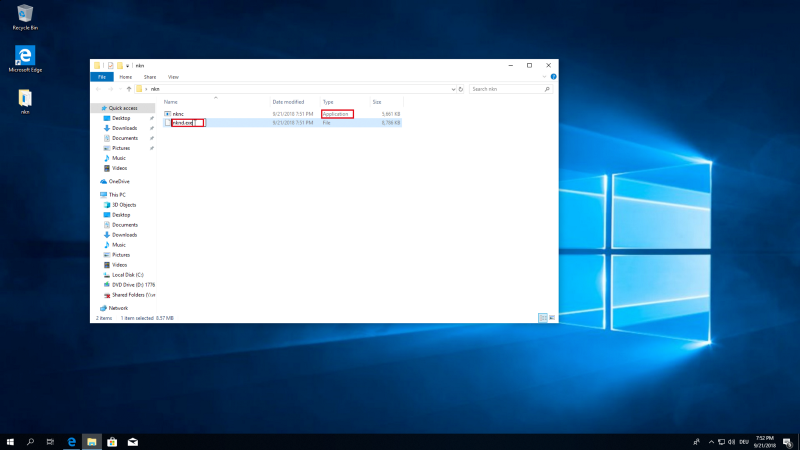
Download the according files and move the contents of the zip-folder (nknd and nknc-file) to the filepath you created in step 1.

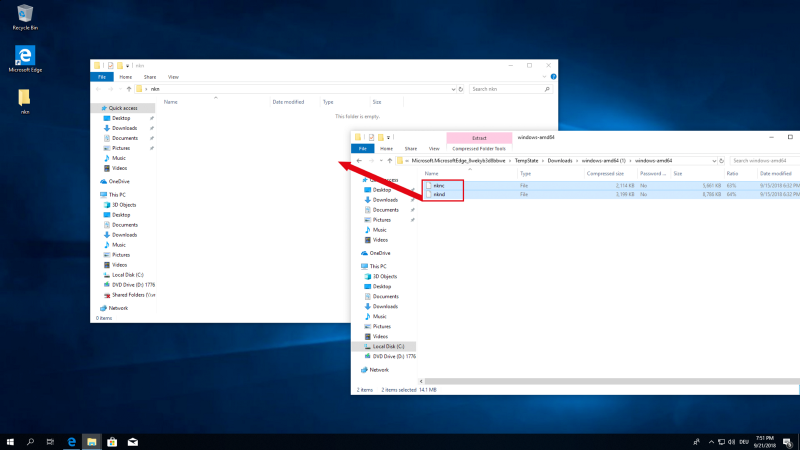
After that we have to do a little bit of bugfixing: Rename “nknd” to “nknd.exe” and “nknc” to “nknc.exe”. You will see that the Type changes from “File”… to “Application”. That will allow our terminal to run the file properly.
Everything done? Then you’re only a few steps away from having your own node!
3. Create the config file
At the moment there are only two files in your NKN-folder: nknd.exe and nknc.exe. That’s a good start, but we have to create a configuration file so that everything is running as intended.
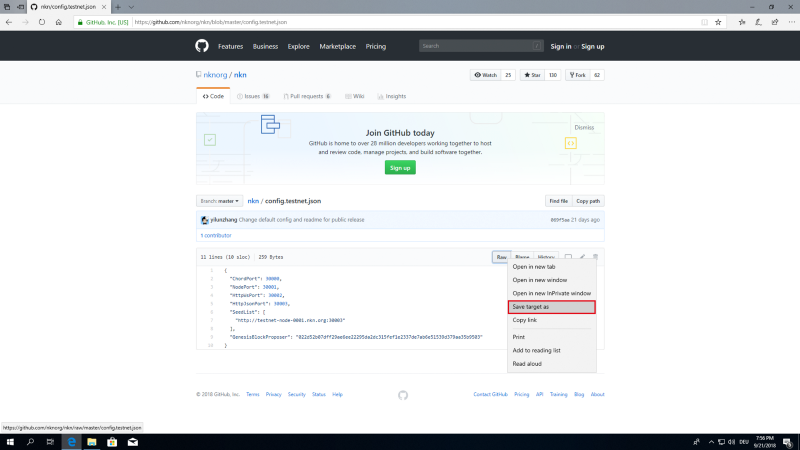
Yet again open your browser and head to https://github.com/nknorg/nkn/blob/master/config.testnet.json. From there right click on the “raw”-Button and choose “save target as…”
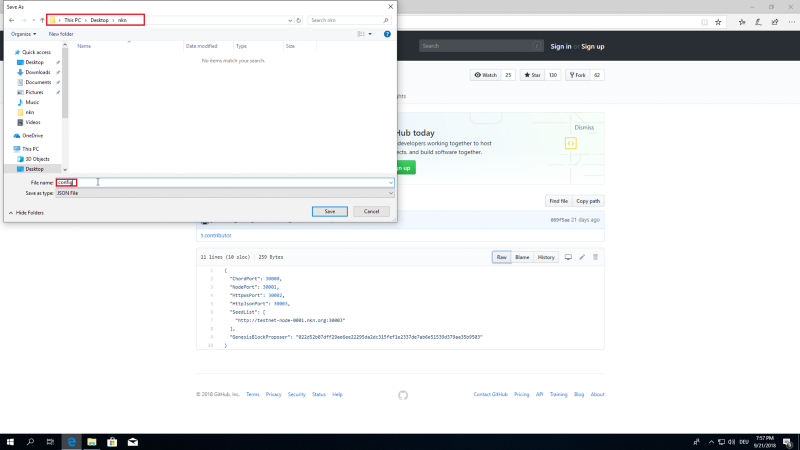
Save it to your NKN folder and change the name to “config”.
4. Create a wallet
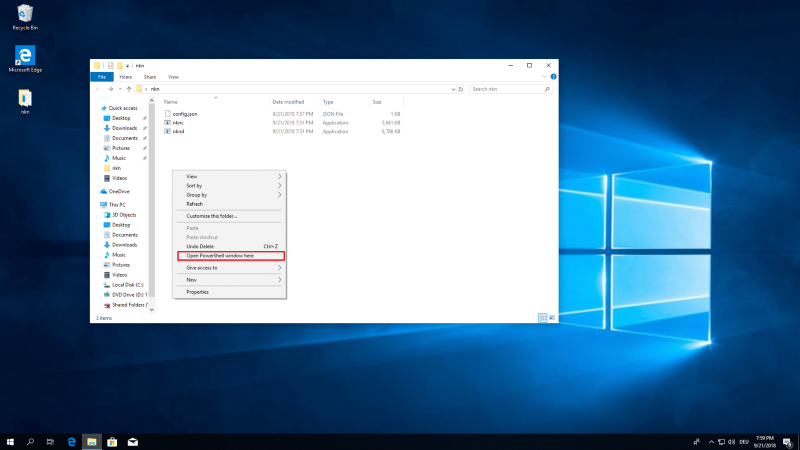
Browse back to your NKN folder, press and hold down SHIFT and right click into it on an empty position. Choose “Open PowerShell here”. Nerdy things will happen, so prepare yourself 
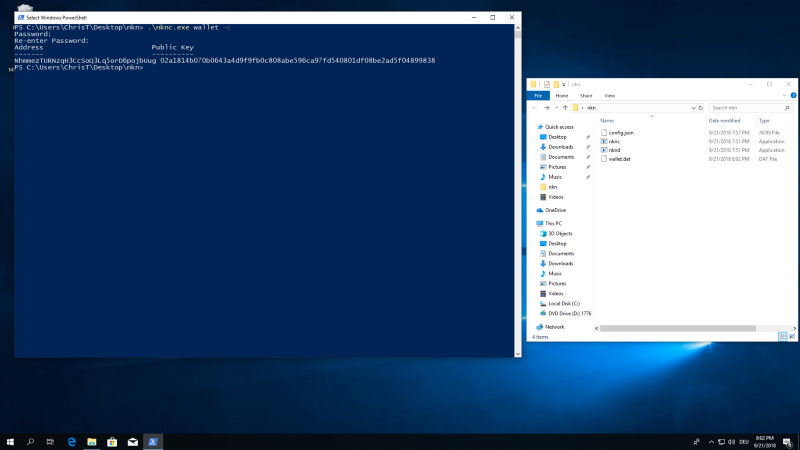
…well, not really. Everything left to run the NKN node is to create a wallet. So type
.\nknc.exe wallet -c
to create it. Choose a password and store all of the shown data to a safe place. Also you may have noticed that a “wallet.dat” file magically appeared in your NKN folder.
If you already got a wallet on another machine just copy the wallet.dat to your NKN folder.
5. Start mining
Wow, you did it! Everything is set up and you can start mining! Start your node with
.\nknd.exe -p YOUR_WALLET_PASSWORD
and test if your node successfully connects to the network. If you’re running the command for the first time you maybe have to allow the process connecting to the internet.
When port-check fails that means you probably forgot to forward ports 30000 to 30003 in your router. This is very specific to your model so make sure you check out https://portforward.com/ to help you get started.
Node runs as intended? Good, then there is a little bonus to that…
6. Automatically run the nkn node at startup
Wouldn’t it be nice to have your new NKN-node starting when you power on your PC? With the right tools it is really easy to do.
On a windows operating system running a background-script is done through a so called “service”. A simple way to create such one tool called NSSM (Non Sucking Service Manager). As time of writing the official site for NSSM (https://nssm.cc) is not available. So we have to install it via another tool called chocolatey .
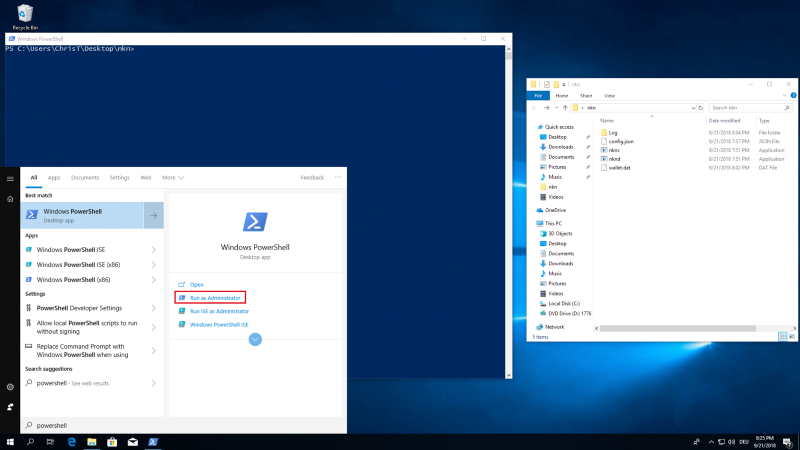
To install it first click on your windows-symbol and type “powershell”. Open a powershell terminal by choosing “run as administrator”. You can alternatively right click on the powershell application and run it as administrator as well.
In it type
Set-ExecutionPolicy Bypass -Scope Process -Force; iex ((New-Object System.Net.WebClient).DownloadString(‘https://chocolatey.org/install.ps1’))
and let the magic happen. The script automatically installs chocolatey and all it’s dependencies. After the installation has finished close the powershell window and re-open it as administrator again (as stated above).
Now type in another command:
choco install nssm
and you got your NSSM up and running! Easy, isn’t it?
Now we got the power to create our nkn service. Type
nssm.exe install
to do so. A new window should’ve popped up where you have to choose the path of nknd.exe. After you did the working directory is automatically filled with the appropriate content.
In the “argument” field type
-p YOURWALLETPW
and finally give your service a name.
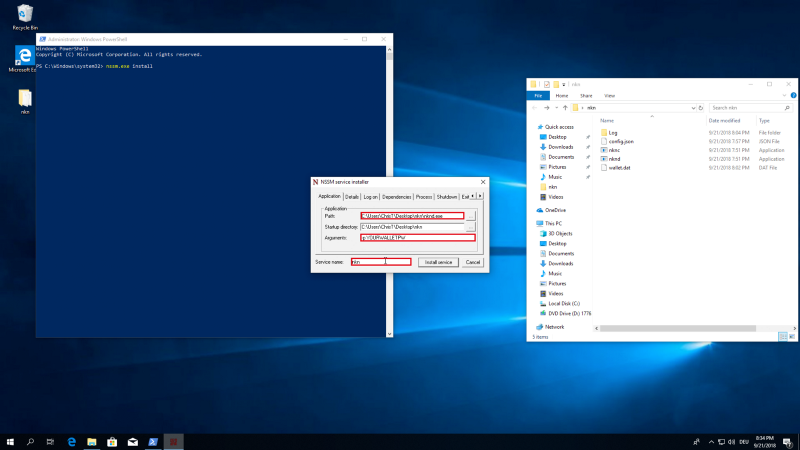
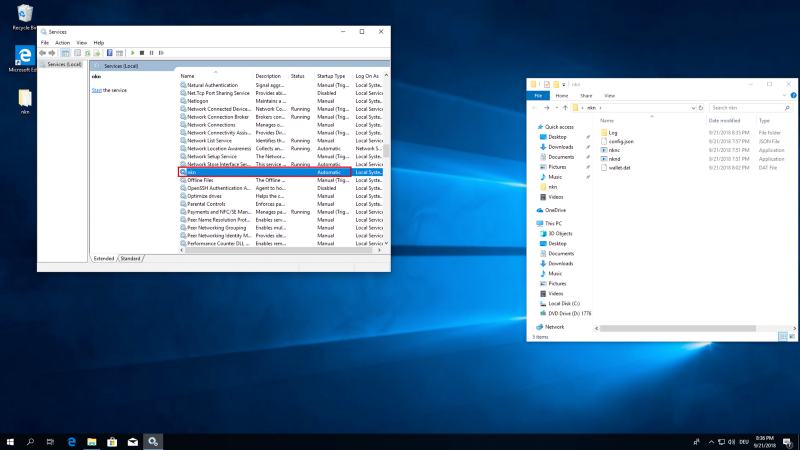
Click on “Install service” and…well…that’s it! Your nkn-node now starts every time you turn on your PC. The service hasn’t started yet because the “boot”-event hasn’t occured yet. You therefore have two options:
- reboot your machine
- click your windows-icon, type “services” and hit ENTER. At the new opened window search for the service “nkn”, right click it and select “start”
Now you can lean back and enjoy your new miner — A true New Kind of Miner — all on a Windows 10 PC!
If there are any questions don’t hesitate to ask me about it. I will update and expand this tutorial regularly. You can reach me on the NKN discord channel (https://discord.gg/c7mTynX — #ChrisT) as well on twitter (@ChristianoBusch) or the NKN telegram channel (#ChrisT).

Home: https://nkn.org/
Email: [email protected]
Telegram: https://t.me/nknorg
Twitter: https://twitter.com/NKN_ORG
Medium: https://medium.com/nknetwork
Linkedin: https://www.linkedin.com/company/nknetwork/
Github: https://github.com/nknorg
Reddit:https://www.reddit.com/r/nknblockchain
Discord: https://discord.gg/c7mTynX