Make your own NKM (New Kind of Miner) out of a Raspberry pi

image

NKN (New Kind of Network) is probably the most exciting blockchain project in the year 2018. With NKN blockchainizing the whole network layer it reaches out to be the third pillar of internet structure besides computing and storageing.

In terms of mining that means that NKN tokens could be earned just by providing your internet bandwidth to the network. On the contrary to many other tokens you don’t need any big server farms or masses of storage — just a network device with an OS and a little bit of configuration. The NKN mining introduction video is a very good point to get started:

Now what’s important to run a node? Obviously you don’t need much computing power and only some space for storing the NKN blockchain on your device — so why don’t use a low-power consuming computer like the raspberry pi? This tutorial describes how to turn it into a NKM (New Kind of Miner).

What you’ll need

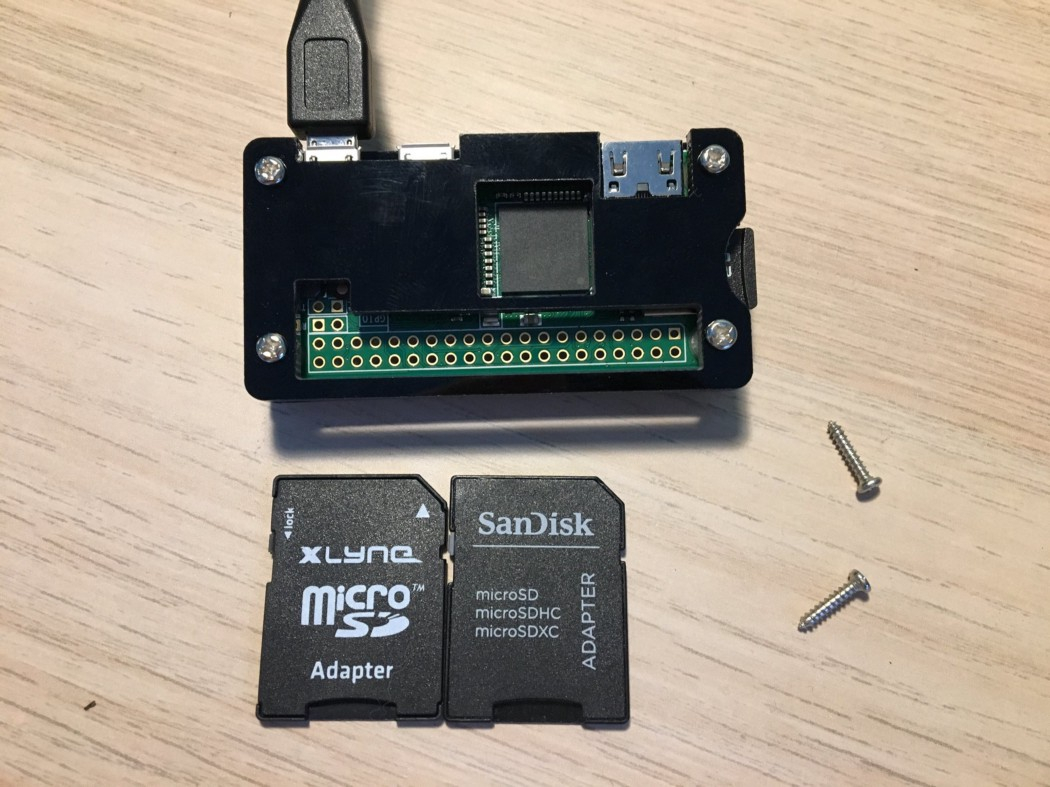
  • A Raspberry pi with a network interface (Raspberry pi 1 Model B and up) or Raspberry pi zero W with a suitable Micro SD Card (16GB+)
  • A personal computer with some sort of SSH Terminal (on Windows I recommend Putty https://www.putty.org/)
  • A way to format your micro SD card with the Raspian Image (recommended: Etcher https://etcher.io/)
  • Your internet connection

Getting started

Before we can start configuring our miner we have to get our raspi ready. The next part describes how to get your device running with the latest Raspberry OS (Raspian) and enable all needed things so you are able to connect to it through SSH.

1. Install Raspian OS

Installing an OS to your Raspberry is very easy. First of all we need to download the OS Image. In this tutorial we are using the latest Raspian Stretch Lite Image. You can get it at https://www.raspberrypi.org/downloads/raspbian/. Store it to the directory of your choice.

After download is finished put the micro SD card to your computer and start up your formatting software. Choose the downloaded image, flash it to your card and wait until it’s finished. Some software like Etcher automatically eject your device. Because we’re not finished yet you need to reinsert it in that case.

If everything went right an external device named “Boot” appears in your file explorer. Depending on the model of your pi continue to the according headless installation step.

2a. Headless installation on Raspberry pi 1 Model B and up

Probably the easiest step of this tutorial. If you got a Raspberry pi 1 Model B and up just copy an empty file called “ssh” (without any file extension) to your micro SD card.
If you got problems creating a file without file extension on windows check out https://www.techwalla.com/articles/how-to-create-a-file-without-an-extension-with-notepad.

2b. Headless installation on Raspberry pi zero W

Headless installation on Raspberry pi zero W is basically the same as on other Raspberries except for an additional file for WiFi configuration.
Two files have to be copied to your SD card:

  • Empty file called “ssh” (without any file extension)

  • file called “wpa_supplicant.conf” with the following code. Adjust country code, ssid and psk to your needs.

      country=DE
      ctrl_interface=DIR=/var/run/wpa_supplicant GROUP=netdev
      update_config=1
      network={
        ssid="SSID_NAME"
        scan_ssid=1
        psk="PASSWORD"
        key_mgmt=WPA-PSK
      }
    

Alright, now we can get started! Safely eject your micro SD card from your PC and put it into your pi. Power it on and wait about 1 minute for it to start. You can access it via SSH-Software by connecting to the following:

Host: raspberrypi
User: pi
Password: raspberry

All went fine? Okay! Then we can finally get our hands on setting up our miner!

Installation on a Raspberry

If you skipped the previous step make sure you are connected to your raspberry via ssh and changed in your pi home directory. In short: if you see

pi@raspberrypi:~ $

on your screen you are fine :wink:

3. Installing newest version of Golang

By default Raspian comes with an old version of go — way too old to use it with NKN. So we first need to install the newest version. Copy and paste the following lines to your terminal:

Look up the latest version of go and store the download path in “url”:

url="$(wget -qO- https://golang.org/dl/ | grep -oP 'https:\/\/dl\.google\.com\/go\/go([0-9\.]+)\.linux-armv6l\.tar\.gz' | head -n 1 )"
wget ${url}

Extract go environment to /usr/local :

sudo tar -C /usr/local -xvf echo ${url} | cut -d '/' -f5

Finally set your environment variables correctly: Please enter line by line with pressing RETURN.

cat >> ~/.bashrc << 'EOF
'export GOPATH=$HOME/go
export PATH=/usr/local/go/bin:$PATH:$GOPATH/bin
EOF

Good job! Now we only need to re-source our bash with:

source ~/.bashrc

and everything should be done! Confirm that by typing

go version

Now your pi should be on a go version of 1.11 or up . Therefore we could start downloading an building the NKN executables.

4. Download and build your NKN node

At the time of writing NKN has to be built in a pre-defined folder structure. Let’s create that and finally jump into it:

mkdir -p ~/go/src/github.com/nknorg && cd ~/go/src/github.com/nknorg

From now on we’re following the official guide to build NKN under https://github.com/nknorg/nkn, but though git is not installed on Raspian Stretch Lite we have to install it:

sudo apt-get install git

Now we can clone the NKN repository:

git clone https://github.com/nknorg/nkn.git

Change directory to new folder:

cd nkn

Build the source code with make

make

Easy, isn’t it? Now you’ve built the main two executables nknc and nknd and are ready for some mining work!

5. mainnet config and wallet creation

Before starting your node you have to rename the right configuration file and create a wallet.

The configuration of a NKN Node is stored in the config.json file. Fortunately NKN already has a testnet configuration file for you which has only to be copied. Just type

cp config.mainnet.json config.json

and you’re done!

By default the earned mining rewards are transferred to the node’s wallet. If you don’t want that (maybe because you want them to be transferred to an offline wallet) you can do this by editing the recently created file. Type

nano config.json

to open that file and fill in your wallet address like so:

"BeneficiaryAddr": "YOUR_NKN_WALLET_ADDRESS",

Regardless if you put in a different address in your config or not you need to create a wallet:

./nknc wallet -c

choose a safe password. If you need this wallet in the future make sure you save your given walletaddress, the fresh created wallet.json in the current folder and your password at a safe place!

6. Test mining

Wow, you did it! Everything is set up and you can start mining! Start your node with

./nknd -p YOUR_WALLET_PASSWORD

and test if your node successfully connects to the network. If that’s not the case you probably forgot to forward ports 30000 to 30003 in your router. This is very specific to your model so make sure you check out https://portforward.com/ to help you get started.

If your node has connected properly you can terminate it by pressing CTRL+C because there is one last thing to do: Configure your NKM to be completely Plug’n’Play — autostart on system load and restart on crash.

7. Plug’n’Play NKM

Switch back into your home directory with

cd ~

Then open a new file called “nkn.service” in nano

nano nkn.service

copy and paste this content. Don’t forget to replace your wallet password :

[Unit]
Description=nkn

[Service]
User=pi
WorkingDirectory=/home/pi/go/src/github.com/nknorg/nkn
ExecStart=/home/pi/go/src/github.com/nknorg/nkn/nknd -p YOUR_WALLET_PASSWORD
Restart=always
RestartSec=3
LimitNOFILE=500000
[Install]
WantedBy=default.target

That creates a service file that automatically creates a process that starts a node and restarts it 3 seconds after it exited unexpectedly.

Copy this file into /etc/systemd/system as root:

sudo cp nkn.service /etc/systemd/system/nkn.service

And now the great final : make the service start on boot.

sudo systemctl enable nkn.service

reboot your device and you’re done!

sudo reboot

8. (NEW) Auto updating NKM

Since NKN is in early development stage it is necessary to update your node regularly. For that you have to repeat some steps under section 4 again — named stopping your currently running node, updating your nkn-files with git pull and then running make again.

Wouldn’t it be nice to make the node updating itself regularly so that we don’t have to take care of it?

As always we start from our home directory. So if you don’t see

pi@raspberrypi:~ $

flashing at your screen change to your home directory by typing

cd ~

First of all we have to create a script that updates the NKN files. So let’s create it by directly jumping into our text editor (cool kids could use vi, I prefer nano)

nano nkn-updater

copy and paste the following contents to it:

HOME=/home/pi
GOPATH=$HOME/go
PATH=/usr/local/go/bin:$PATH:$GOPATH/bin
cd $HOME/go/src/github.com/nknorg/nkngit fetch &>/dev/nullLOCAL=$(git rev-parse HEAD)
UPSTREAM=$(git rev-parse @{u})if [ $LOCAL != $UPSTREAM ]
then
systemctl stop nkn.service;
git merge;
make deepclean;
make;
chown -R pi:pi $HOME/go;
systemctl restart nkn.service;
fi

Then exit the file by pressing CTRL+X and Y. To make this file executable we quickly run

chmod +x nkn-updater

Last thing to do is to tell Debian to run our script daily at 12 AM. For this we have to edit our crontab list. Start it by running

sudo crontab -e

accept nano as your default editor by pressing RETURN and now you will get to the crontab file. Then append the following line to the end of the file:

00 12 * * * /home/pi/nkn-updater >/dev/null 2>&1

Again exit and save your file by pressing CTRL+X and Y. And you’re done — no more configuration needed!

Now you can lean back and enjoy your new automated miner — A true New Kind of Miner!

If there are any questions don’t hesitate to ask me about it. I will update and expand this tutorial regularly. You can reach me on the NKN discord channel (https://discord.gg/c7mTynX#ChrisT) as well on twitter (@ChristianoBusch) or the NKN telegram channel (#ChrisT).

2 Likes

I always wanted to ask someone who had experience with RaspPi

So if I start a small miner farm of 20-25 rasp pi in my home, what kind of precautions I can take to reduce the overheading problems? I assume they’ll be running 24x7x365, what kind of electricity bill I can expect?

Thanks.

First of all and most importantly, you need one public IPv4 addresses for each Raspberry Pi. This might be challenging for most home users.

I won’t worry too much about heat: at least my Raspberry 3 B+ with cheap small heatsink is lukewarm when running NKN software. With load, it consumes about 6.4 watts as measured in this article:

1 Like

This is informative. Thank you for taking the time out to reply.

I never thought getting a static public IP would be this much of a pain…
Is there any solution to get static public IP? Seems like my ISP consider it as a business plan feature.

Thanks for your great tutorial.

I’m stocking on Step 6)

./nknd -p YOUR_WALLET_PASSWORD => gets me an ERROR

First my configuration:

  • Raspberry Zero
  • Go 15.6.
  • PortForward 3000-30003

2020/12/07 16:49:34.249864 [INFO ] GID 1, My IP address is xxx.xx.xxx.xxx
2020/12/07 16:49:34.254339 [INFO ] GID 1, set default cert domain to: xxx-xx-xxx-xxx.ipv4.nknlabs.io
2020/12/07 16:49:34.257468 [INFO ] GID 1, use default https certs
2020/12/07 16:49:34.260587 [INFO ] GID 1, use default wss certs
2020/12/07 16:49:34.399297 [INFO ] GID 1, database Version: 1
2020/12/07 16:49:34.418109 [INFO ] GID 1, State root: a86c96961085f6b26fc6ca32036eeee0f58c976aa44f079ff905ef4f6a6befb0
2020/12/07 16:49:34.421265 [INFO ] GID 1, Start pruning…
2020/12/07 16:49:34.426101 [INFO ] GID 1, get height of trie pruned error: leveldb: not found
2020/12/07 16:49:34.429603 [INFO ] GID 1, get compact height error: leveldb: not found
2020/12/07 16:49:34.443102 [INFO ] GID 1, get no ID from local ledger
2020/12/07 16:49:34.987880 [INFO ] GID 1, GetID got resp: {“error”:{“code”:-45022,“data”:null,“message”:“INTERNAL ERROR, there is no ID in account”},“id”:“1”,“jsonrpc”:“2.0”} from http://mainnet-seed-0004.nkn.org:30003

==> Should I care about the last “INTERNAL ERROR, there is no ID in account”?

Followed by

2020/12/07 16:49:36 [INFO] [xxx-xx-xxx-xxx.ipv4.nknlabs.io] AuthURL: https://acme-v02.api.letsencrypt.org/acme/authz-v3/9140403781
2020/12/07 16:49:36 [INFO] [.xxx-xx-xxx-xxx.ipv4.nknlabs.io] acme: Could not find solver for: tls-alpn-01
2020/12/07 16:49:36 [INFO] [.xxx-xx-xxx-xxx.ipv4.nknlabs.io] acme: use http-01 solver
2020/12/07 16:49:36 [INFO] [.xxx-xx-xxx-xxx.ipv4.nknlabs.io] acme: Trying to solve HTTP-01
2020/12/07 16:49:36.838271 [INFO ] GID 1, GetID got resp: {“error”:{“code”:-45022,“data”:null,“message”:“INTERNAL ERROR, there is no ID in account”},“id”:“1”,“jsonrpc”:“2.0”} from http://mainnet-seed-0009.nkn.org:30003
2020/12/07 16:49:36 [INFO] Deactivating auth: https://acme-v02.api.letsencrypt.org/acme/authz-v3/9140403781
2020/12/07 16:49:37.174145 [INFO ] GID 1, GetNonceByAddr got resp: {“id”:“1”,“jsonrpc”:“2.0”,“result”:{“currentHeight”:2044055,“nonce”:0,“nonceInTxPool”:0}} from http://mainnet-seed-0040.nkn.org:30003
2020/12/07 16:49:37.180648 [INFO ] GID 1, Creating generate ID txn. This process may take quite a few minutes…
2020/12/07 16:49:37.233934 [ERROR] GID 30, apply cert failed: error: one or more domains had a problem:
[xxx-xx-xxx-xxx.ipv4.nknlabs.io] [xxx-xx-xxx-xxx.ipv4.nknlabs.io] acme: error presenting token: could not start HTTP server for challenge: listen tcp :80: bind: permission denied
2020/12/07 16:49:38.075469 [INFO ] GID 30, read resourceFile err: open certs/xxx-xx-xxx-xxx.ipv4.nknlabs.io.resource.json: no such file or directory
2020/12/07 16:54:34.354572 [INFO ] GID 32, https server is unavailable yet

This [ERROR] sounds bad…

Checking the open ports from an distant systems tells me:
30000 closed
30001 closed
30002 closed
30003 open
=> I guess it’s not open because startup didn’t worked correctly.

However, any idea on this?

Hi, First thanks for your interest in running NKN!

If you are running the Raspberry Pi from home network, you might need to open up the ports or configure port forwarding on your home router. Basically at least the 30001-300021 ports should be open. Since each router has totally different admin pages, can you try to find out how to configure port forwarding on your home router?

Thanks for your response.

Router seams to be configured correctly (I have other open ports for other services).
Actually, I’ve changed my settings to UPnP => now the nkn host takes:
2020/12/07 23:53:14.627311 [INFO ] GID 1, Discovering NAT gateway…
2020/12/07 23:53:18.923294 [INFO ] GID 1, Mapped external port 30001 to internal port 30001
2020/12/07 23:53:18.966343 [INFO ] GID 1, Mapped external port 30002 to internal port 30002
2020/12/07 23:53:19.005264 [INFO ] GID 1, Mapped external port 30004 to internal port 30004
2020/12/07 23:53:19.039322 [INFO ] GID 1, Mapped external port 30003 to internal port 30003
2020/12/07 23:53:19.069659 [INFO ] GID 1, Mapped external port 30005 to internal port 30005

When is nkn running, the same error occurs. Remote hosts (outside my network) says:
30000/tcp filtered ndmps
30001/tcp closed pago-services1
30002/tcp closed pago-services2
30003/tcp open amicon-fpsu-ra
30004/tcp closed amicon-fpsu-s
30005/tcp closed unknown

When nkn is not running, all ports are closed => so, I think it’s not a port forwarding issue.

I tried running the command with su rights, it generates me this message:
2020/12/07 23:59:12.455141 [ERROR] GID 49, apply cert failed: error: one or more domains had a problem:

[.xxx-xx-xxx-xxx.ipv4.nknlabs.io] acme: error: 400 :: urn:ietf:params:acme:error:connection :: Fetching .http://xxx-xx-xxx-xxx.ipv4.nknlabs.io/.well-known/acme-challenge/yDxm6y4uXPfeaGQn2k6KkKb5Iedv_dhyO-u3TPSZxCA: Timeout during connect (likely firewall problem), url:

Ping to xxx-xx-xxx-xxx.ipv4.nklabs.io works (from inside and outside network).
Firewall is not blocking.
url: is empty

Thanks for your support on this.
If I can provide more log files or something like that, just let me know.

Hi nebeleben,

The certification related error you saw is generally not a problem because TLS certificate is not mandatary for a node to function. That’s why nknd continues to run. It is, however, a nice function to have so node will be able to provide https/wss service. So you have two options here:

  1. Ignore the error and you should be fine
  2. Fix it by starting nknd with root. And if you have a firewall or something, you need to forward port 80 as well.

BTW, in your logs there is a line

2020/12/07 16:49:37.180648 [INFO ] GID 1, Creating generate ID txn. This process may take quite a few minutes…

which means your node is generating ID. It will take quite a few hours typically.

Hi yilun, thanks for your response :slight_smile:

Ah, I think I get it now… It’s a letsencrypt challenge something issue…
Open port 80 is a bit bad, but I think it’s just needed for the first challenge (and afterwards may be for renewing, hopefully).

I’ve started option 2) it seams to work.

This is the last message I get, I guess now it takes some hours :wink:
2020/12/08 01:14:10.222324 [INFO ] GID 51, https cert received

Thanks again for your support.
I’ll come back to you when the process finished and let you know the result.

1 Like

Hi yilun
Hi zbruceli

It looks good right now, but there is a single problem left: ID trx generation. First attempt crashed (broken pipe over ssh) after 8 hours, last attempt crashed after about 9 hours. This is actually not a NKN issue I guess.
However, is there a possibility to generate the ID on another, more powerful machine and then transfer it to the raspberry?

I’ve started the ID generation within systemctl… (to avoid broken pipe when my workstation goes down or what ever).

Thanks for your support.

Yes you can do that, and there are two ways:

  1. Generate a wallet on another machine, use that to generate ID, and when it finishes, stop that nknd and copy wallet.json (and password) back to raspberry pi
  2. Copy the wallet.json (and password) to another machine, when generating ID is done, stop that nknd and start nknd on raspberry pi

Basically generating ID is a on-chain transaction, and it doesn’t matter which machine you use to do it as long as it’s using the same wallet

Thanks yilun for your advice.

Hi yilun,

Ok, generating ID worked as expected.
I’ve used a win10 workstation. There is a web UI on :30000 to see the current state of the node. Is there something similar for rasp? The port 30000 is used (on rasp) but not accessible from another node inside the same network.

Thanks :slight_smile:

You can use --web-gui-listen-address argument to let nknd listen on a different address instead of 127.0.0.1, something like 0.0.0.0 will work. You can use nknd -h to see the argument and info

Hello, I followed all the steps above but I hit a brick wall where I cannot make from source code.
I’m installing on a Raspberry 3B+, fresh install, current Rasbian, Go 1.11 is installed. Yet I get these errors Can you help me?
/////////////////////////////////
pi@raspberrypi:~/nkn $ sudo make
make build_local || make build_local_with_proxy
make[1]: Entering directory ‘/home/pi/nkn’
make build BUILD_DIR=. BIN_DIR=.
make[2]: Entering directory ‘/home/pi/nkn’
GOPROXY= GOOS= GOARCH= GOARM= GO111MODULE=on go build -ldflags “-s -w -X github.com/nknorg/nkn/v2/config.Version=v2.0.7-1-g0498” -o ././nknd ./cmd/nknd/
build github.com/nknorg/nkn/v2/cmd/nknd: cannot find module for path crypto/ed25519
make[2]: *** [Makefile:29: build] Error 1
make[2]: Leaving directory ‘/home/pi/nkn’
make[1]: *** [Makefile:71: build_local] Error 2
make[1]: Leaving directory ‘/home/pi/nkn’
make[1]: Entering directory ‘/home/pi/nkn’
make build_local GOPROXY=https://goproxy.io
make[2]: Entering directory ‘/home/pi/nkn’
make build BUILD_DIR=. BIN_DIR=.
make[3]: Entering directory ‘/home/pi/nkn’
GOPROXY=https://goproxy.io GOOS= GOARCH= GOARM= GO111MODULE=on go build -ldflags “-s -w -X github.com/nknorg/nkn/v2/config.Version=v2.0.7-1-g0498-dirty” -o ././nknd ./cmd/nknd/
build github.com/nknorg/nkn/v2/cmd/nknd: cannot find module for path crypto/ed25519
make[3]: *** [Makefile:29: build] Error 1
make[3]: Leaving directory ‘/home/pi/nkn’
make[2]: *** [Makefile:71: build_local] Error 2
make[2]: Leaving directory ‘/home/pi/nkn’
make[1]: *** [Makefile:75: build_local_with_proxy] Error 2
make[1]: Leaving directory ‘/home/pi/nkn’
make: *** [Makefile:79: build_local_or_with_proxy] Error 2

Welcome to the NKN community!

According to our CTO’s recent software release notes: “Starting from previous version v2.0.5, minimal Golang version required is 1.13”. So please upgrade your go version first.

Thank you for your reply. I did so, I’m on go version go1.15.6 linux/arm now. I purged the github download and nkn folders and started the process all over, I’m facing a differnt issue now.
I’m not well versed in Linux enough to identify the problem… Can you help me further?
//////////////////////////////////
pi@raspberrypi:~/go/src/github.com/nknorg/nkn $ sudo make
make build_local || make build_local_with_proxy
make[1]: Entering directory ‘/home/pi/go/src/github.com/nknorg/nkn’
make build BUILD_DIR=. BIN_DIR=.
make[2]: Entering directory ‘/home/pi/go/src/github.com/nknorg/nkn’
GOPROXY= GOOS= GOARCH= GOARM= GO111MODULE=on go build -ldflags “-s -w -X github.com/nknorg/nkn/v2/config.Version=v2.0.7-1-g0498” -o ././nknd ./cmd/nknd/
/bin/sh: 1: go: not found
make[2]: *** [Makefile:29: build] Error 127
make[2]: Leaving directory ‘/home/pi/go/src/github.com/nknorg/nkn’
make[1]: *** [Makefile:71: build_local] Error 2
make[1]: Leaving directory ‘/home/pi/go/src/github.com/nknorg/nkn’
make[1]: Entering directory ‘/home/pi/go/src/github.com/nknorg/nkn’
make build_local GOPROXY=https://goproxy.io
make[2]: Entering directory ‘/home/pi/go/src/github.com/nknorg/nkn’
make build BUILD_DIR=. BIN_DIR=.
make[3]: Entering directory ‘/home/pi/go/src/github.com/nknorg/nkn’
GOPROXY=https://goproxy.io GOOS= GOARCH= GOARM= GO111MODULE=on go build -ldflags “-s -w -X github.com/nknorg/nkn/v2/config.Version=v2.0.7-1-g0498” -o ././nknd ./cmd/nknd/
/bin/sh: 1: go: not found
make[3]: *** [Makefile:29: build] Error 127
make[3]: Leaving directory ‘/home/pi/go/src/github.com/nknorg/nkn’
make[2]: *** [Makefile:71: build_local] Error 2
make[2]: Leaving directory ‘/home/pi/go/src/github.com/nknorg/nkn’
make[1]: *** [Makefile:75: build_local_with_proxy] Error 2
make[1]: Leaving directory ‘/home/pi/go/src/github.com/nknorg/nkn’
make: *** [Makefile:79: build_local_or_with_proxy] Error 2

I believe it might be related to setting up the Go environment. Have you tried the one-line script from our CTO below? Please do it as root user.

curl https://gist.githubusercontent.com/yilunzhang/2f5edffc16c2b6a999c33cb1c13d6728/raw/4101eee4b5e4a1406accbdf3ddeb1dc40189c484/nkn-old-1-click-upgrade-golang.sh | sh

If the above does not work, please try this tutorial:

Works like a dream :slight_smile:
Thanks for all your support.

1 Like