
1. Configuring your NAS
1.1 Setting up a backup folder
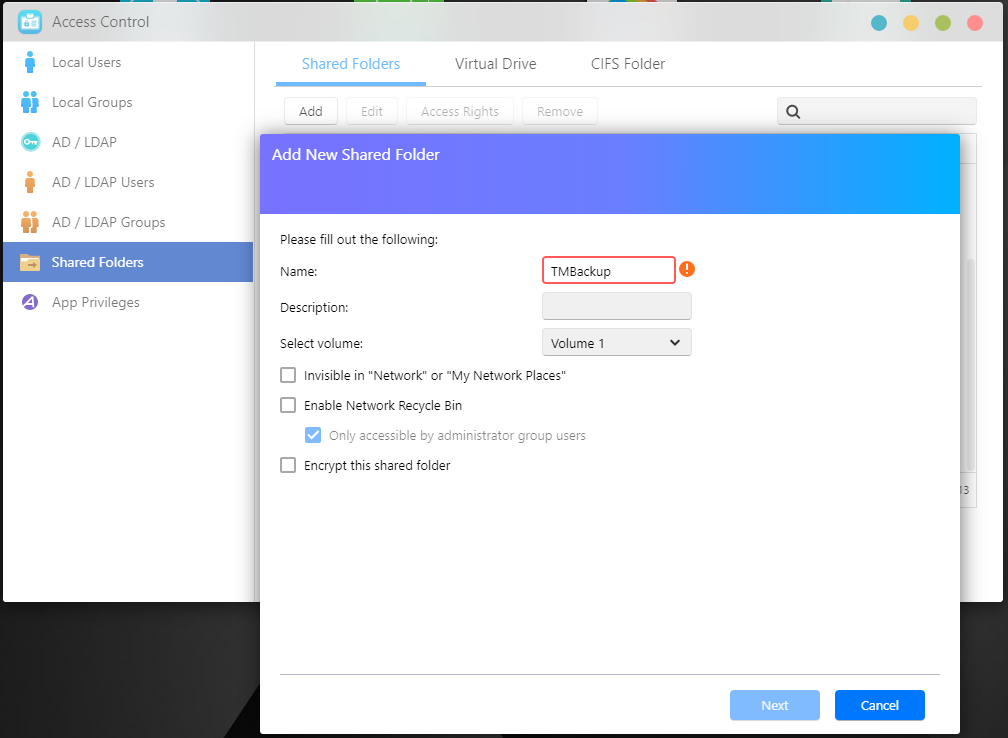
STEP 1
Select [Access Control] → [Shared Folders] and click on the [Add] button under the Shared Folders tab to create a new shared folder (in our example, “TMBackup”). Follow the steps provided by the wizard to complete the folder creation process.
1.2 Creating an account
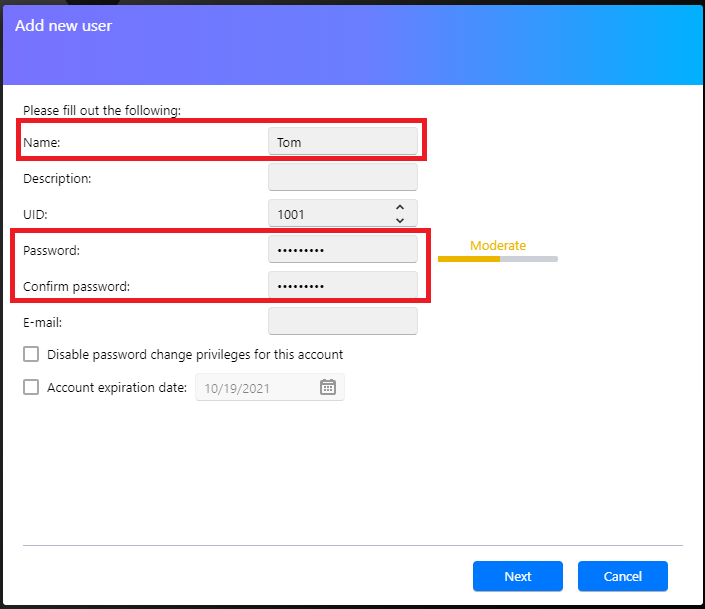
STEP 1
Select [Access Control] → [Local Users] and then click on the [Add] button. The Add New User wizard will now appear. Fill out the required information and follow the steps to create a new user.
1.3 Enabling AFP service
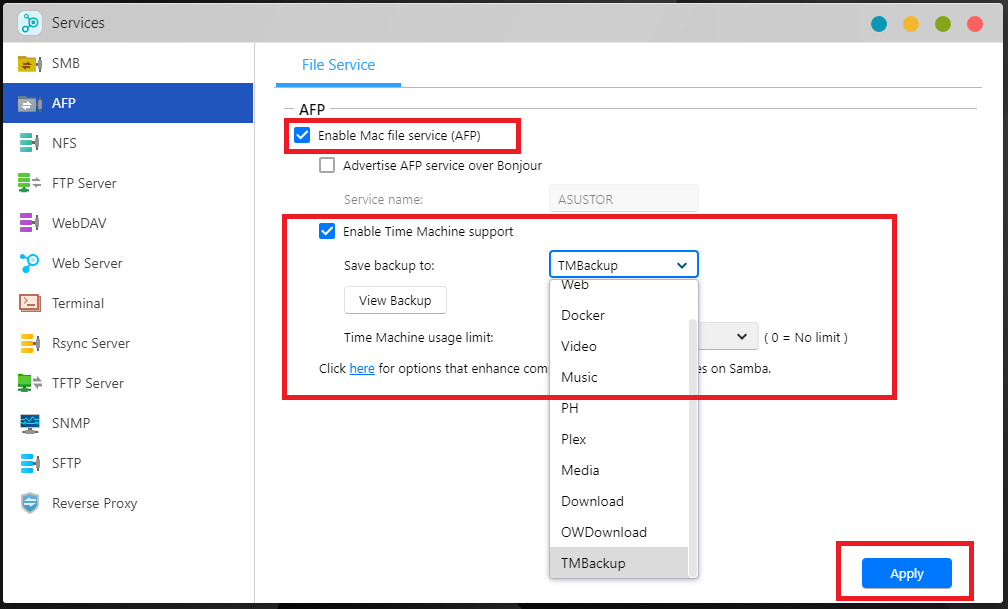
STEP 1
ü Log in to ADM and then select [Services] → [AFP] .
ü Select the [Enable Mac file service (AFP)] checkbox and then click [Apply].
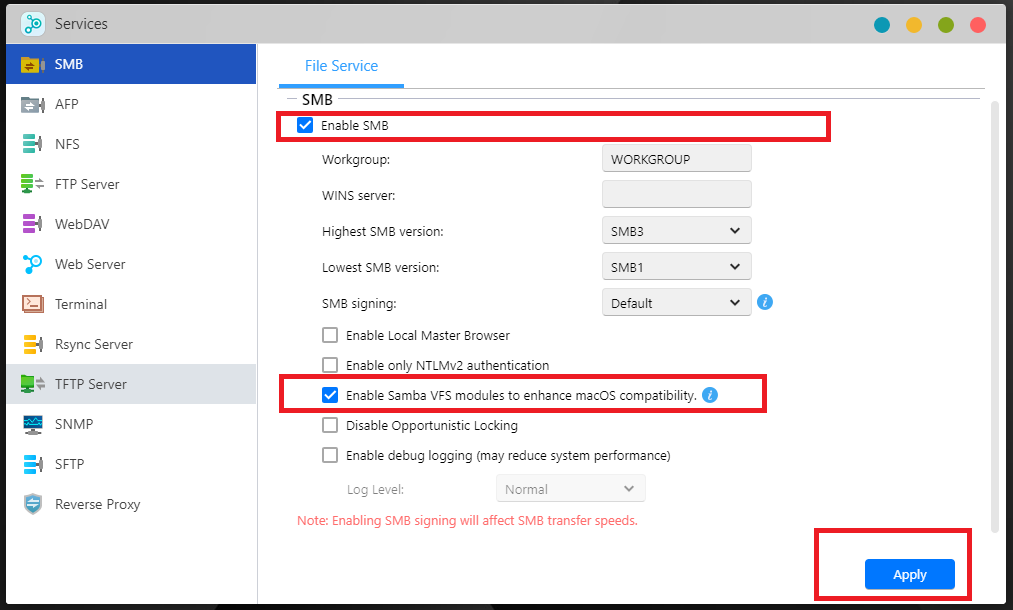
üSelect [Services] → [SMB].
2. Configuring Apple macOS
2.1 Connecting to your NAS via AFP/SMB
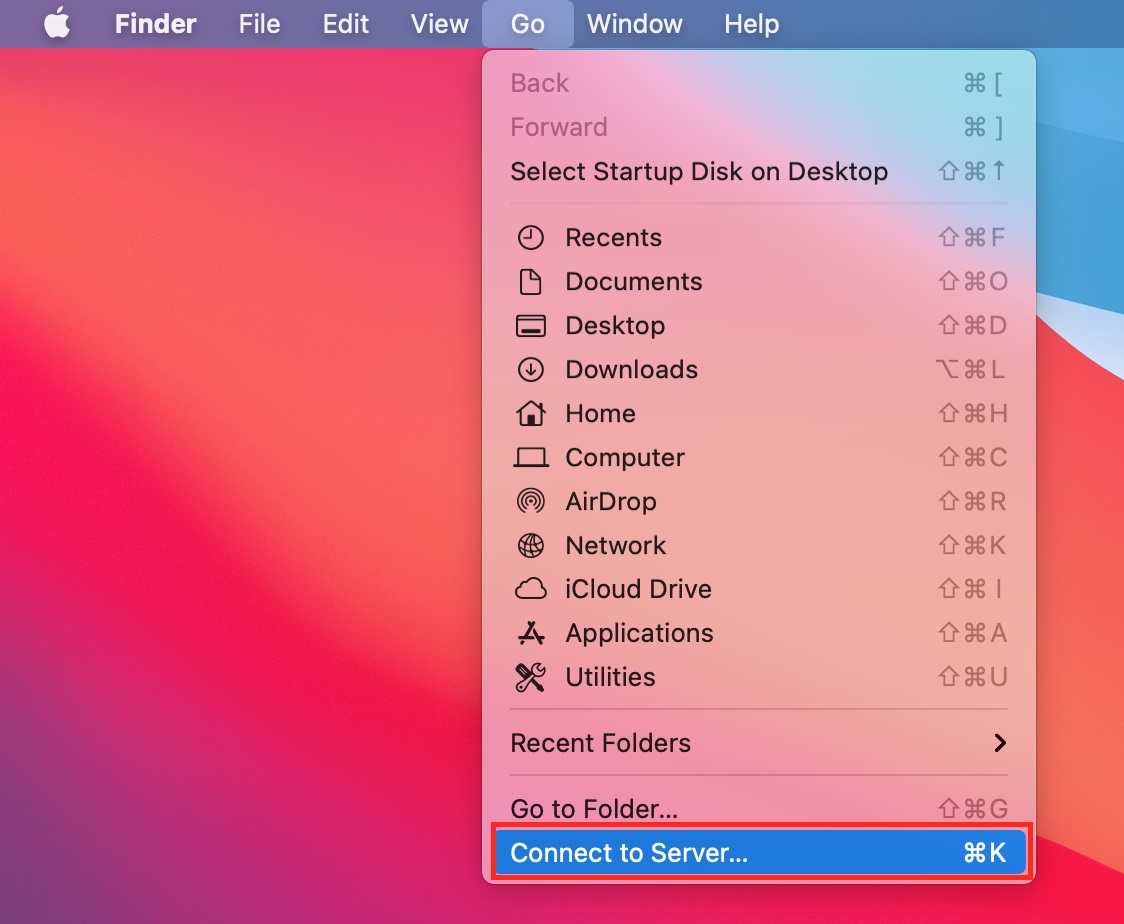
STEP 1
In macOS select [Go] → [Connect to Server…]
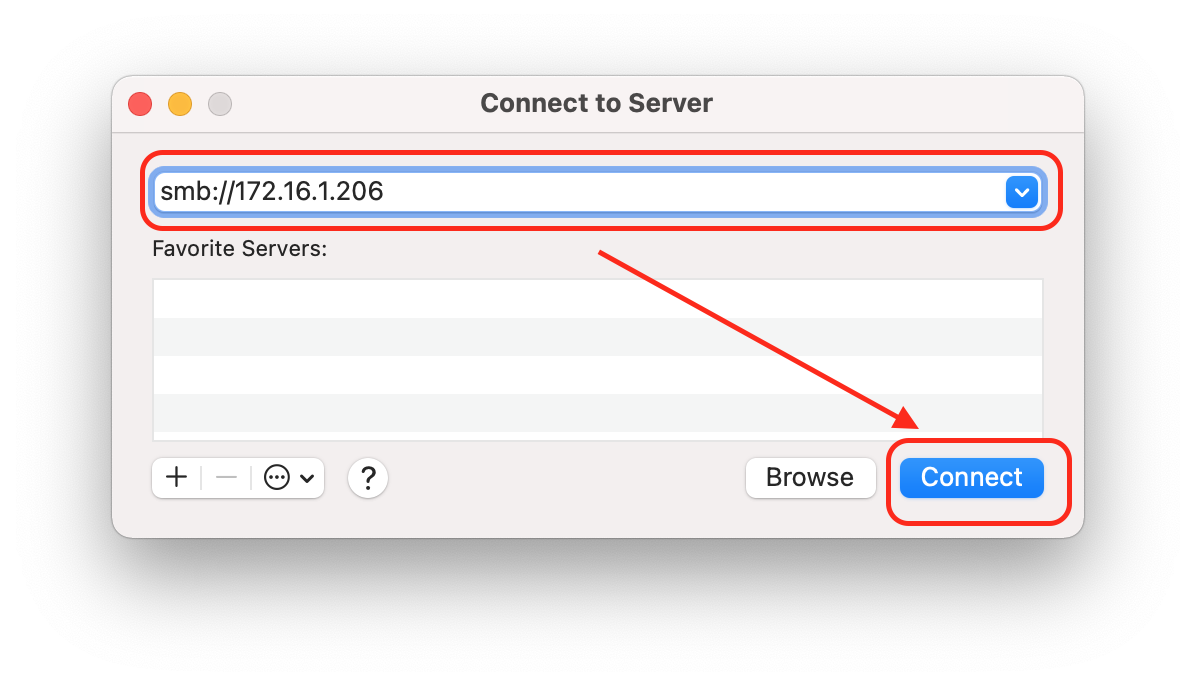
STEP 2
In the [Server Address:] field, enter your NAS’s IP address and then click [Connect] (for example: afp://172.16.1.206).

smb://172.16.1.206

STEP 3
Enter the username and password for the previously created account and then click [Connect] .
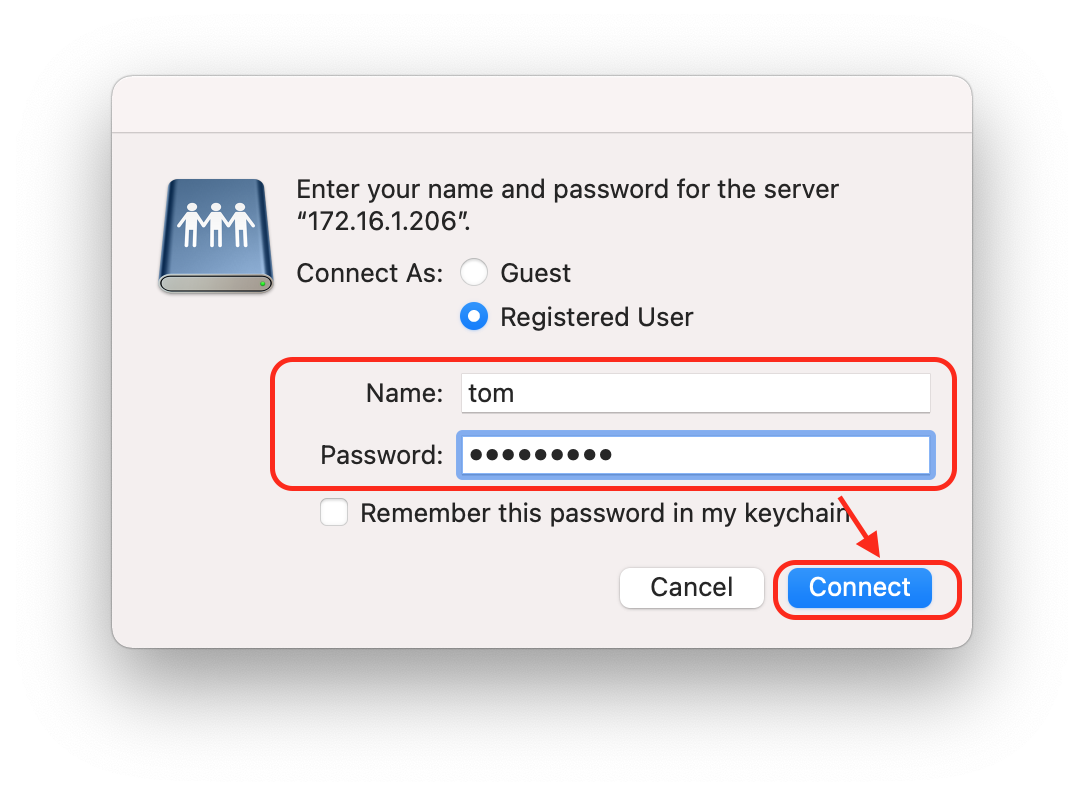
Note: it is recommended that you select the [Remember this password in my keychain] checkbox in order to avoid having to enter your password every time you execute a backup job.
STEP 4
Select your previously created backup folder (in our example, “TMBackup”) and then click on [OK] .

2.2 Backing up data to your NAS using Time Machine