
[Updated for 2020] Now we standardize all 1-click cloud deployment to NKN Commercial, all new installation will require a pre-existing wallet. This wallet is called Beneficiary Address, and all the mining rewards will be automatically deposited into the Beneficiary Address. If you do not already have a wallet, you can create a wallet using the official NKN wallet.
To create a NKN Full Node with a Pre-existing wallet:
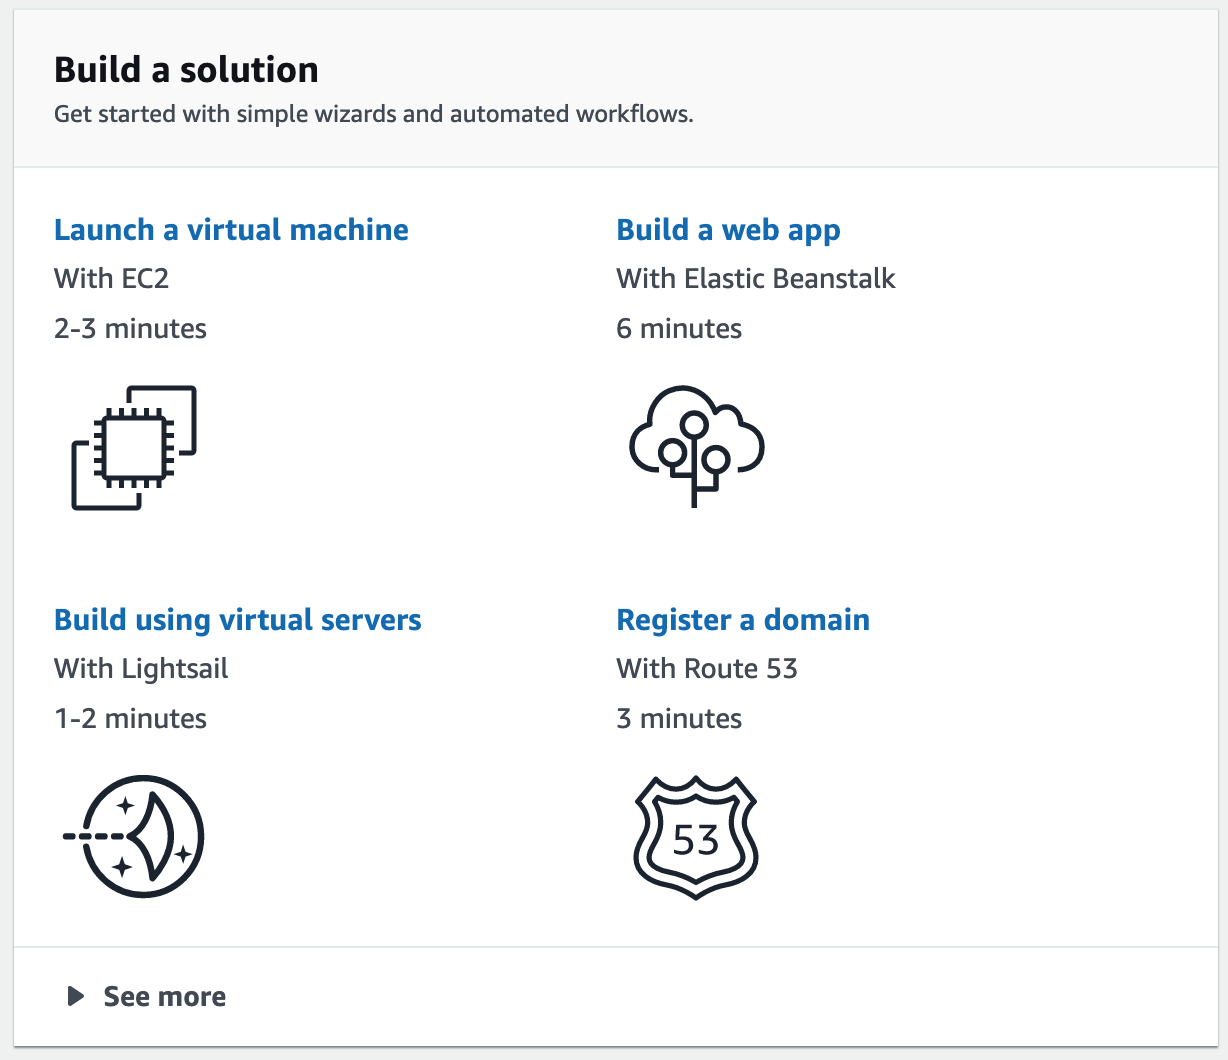
- From the AWS Management Console, Click on the link “Launch a Virtual Machine with EC2”.
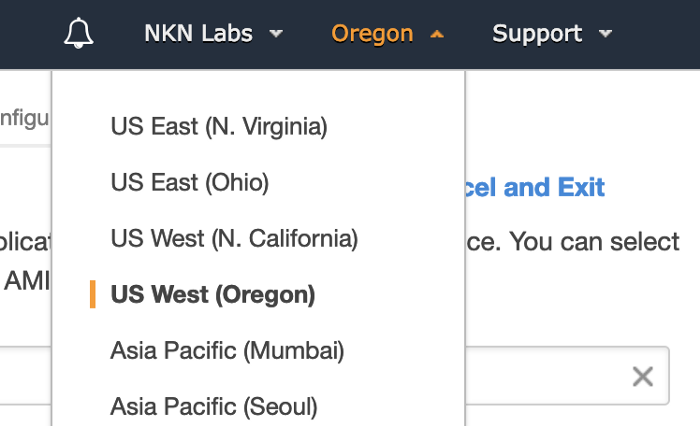
- Set the region you would like to launch your NKN Full Node by going to the upper right hand corner of the console window and clicking on the region (2nd option from the right) and selecting the desired region from the drop down menu (example: US West (Oregon))
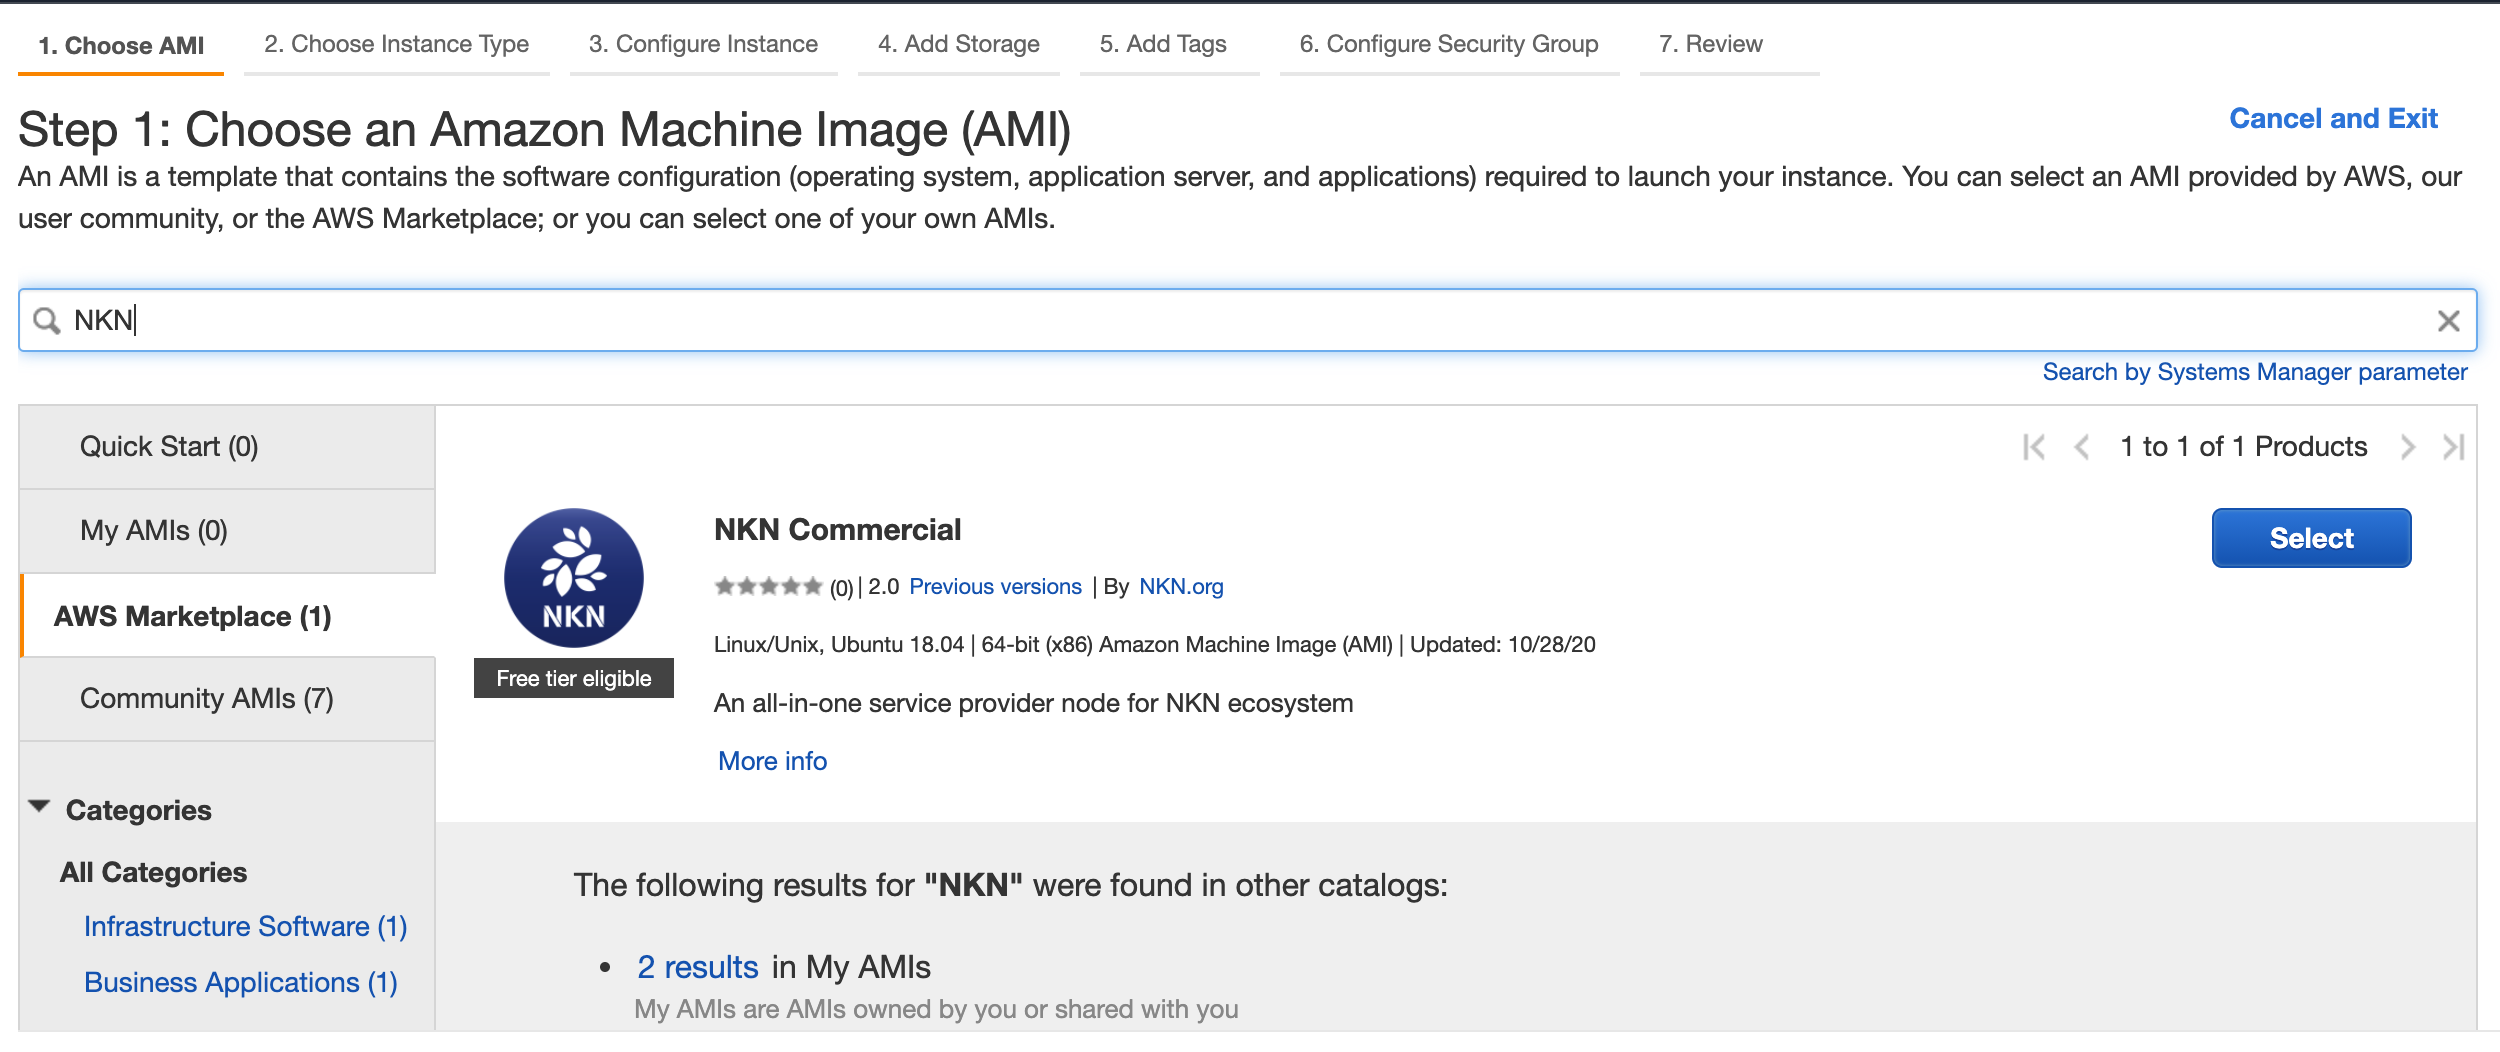
- On the next page choose “AWS Marketplace” from the menu on the left hand side of the page and in the search bar type “NKN” and press enter to search the marketplace. Click the “Select” button next to the NKN entry. Review the resulting pop-up window for details on the NKN Full Node and click “Continue”
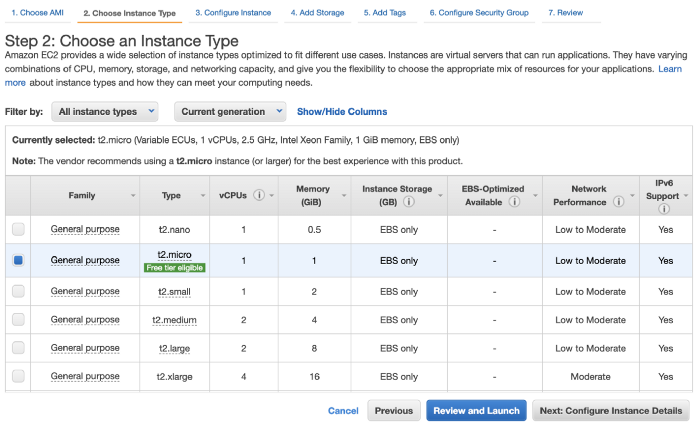
- On the next page you can choose an instance type. Choose the “t2.micro” instance and click on the “Next: Configure Instance Details” in the lower right hand corner
- From the Configure Instance Details Page, scroll to the bottom and click on “Advanced Details” to expand the menu. You should see a parameter called User Data and a text box next to it that reads ‘optional’. Above the text box, choose “As text” and in the box paste the contents below:
#cloud-config

write_files:
  - owner: nkn:nkn
    path: /home/nkn/nkn-commercial/config.json
    content: |
      {
        "beneficiaryAddr": "YOUR_EXISTING_NKN_WALLET_ADDRESS"
      }
Replace YOUR_EXISTING_NKN_WALLET_ADDRESS in the text above with your NKN wallet address, a string starting with the letter NKN (example: NKNJLh2fzjrppBAzSbQbRz2HWmNoqacZ3EVQ).
When Complete click “Next: Add Storage” in the lower right hand corner.
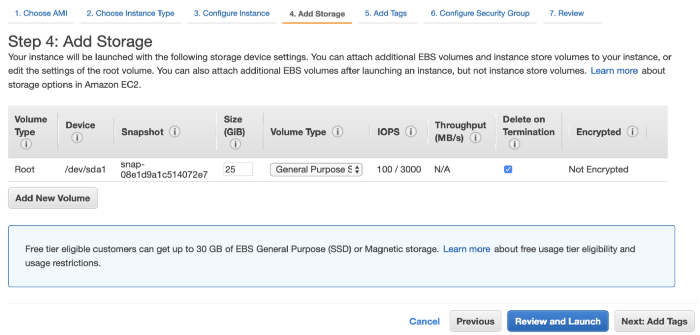
- From the Add Storage Page, choose 25GB and click “Review and Launch” in the lower right hand corner.
- Review your settings and when ready click Launch. After you click launch, a pop up window will ask to choose a key pair. Either choose an existing pair or create a new key pair.
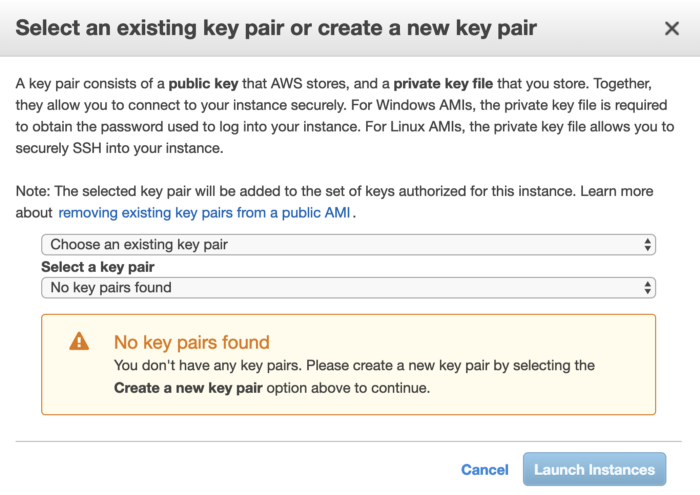
NOTE: You can use the key pair to help login to the instance later if needed. See https://docs.aws.amazon.com/AWSEC2/latest/UserGuide/ec2-key-pairs.html for more information.
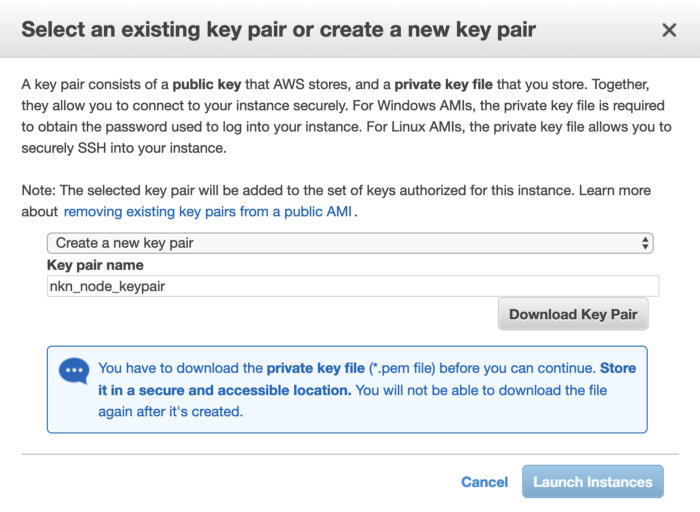
To create a key pair, choose “Create a new key pair” from the drop down menu, choose a name for your new key pair and click the button “Download Key Pair”.
For Apple Safari Users: The resulting file will initially come with .pem.txt extension, you can remove the .txt so it will end with a .pem extension. Y
For Google Chrome Users: The file downloaded with have the correct .pem extension.
You also need to change the attributes of the key file using the following command: chmod 400 KEY_PAIR_FILE
Example: chmod 400 nkn_node_keypair.pem
Click “Launch Instances”.
After Launch
After the instance is created, nknd (NKN daemon) will be launched automatically by supervisor under user nkn, and your instance will join the NKN relay network without any further configurations.
Once the node has been started you can check the status using any of these methods:
-
Use community built miner portal nknx.org or simple node status check tool nstatus.org — You just need the public IP address of your VM in order to check its status.
-
Command line tool nknc from a remote computer. You can download the latest nknc release and use the command
./nknc — ip YOUR_NODE_IP_ADDRESS info -sto view the status of your node. -
Command line tool nknc from within the VM. The tool nknc is already installed and located in the directory
/home/nkn/nkn-commercial/services/nkn-node. You can use the command./nknc info -sto view the status of your node. For additional commands, type./nknc — help
Next Steps
For more information on NKN Full Node, please visit our Github. You can use the NKN network to transmit any data from peer to peer using nkn-sdk-js or other NKN client implementations. You can also transfer NKN tokens using the NKN Web Wallet, desktop wallet Vault by nknx, or mobile wallet nMobile.
Please join the NKN Discord group or visit the NKN Forum for more technical support and discussions.
[Totally optional] Backup local NKN Wallet
Once the NKN Commercial is deployed, a local NKN wallet and its password will be generated automatically. These files are not at all important, since you will use Beneficiary Address to manage your mining rewards and other NKN commercial service income. But if you are wondering, these two files will be created under the directory /home/nkn/nkn-commercial/services/nkn-node named wallet.json and wallet.pswd respectively.
In order to backup your wallet.json and wallet.pswd files, you need to use the following steps:
1.) Using your chosen key pair, login to the NKN Full Node instance you have created on AWS. From your favorite terminal (PuTTy, OSX terminal, etc.) run the following command: ssh -i KEY_PAIR_FILE ubuntu@AWS_VM_PUBLIC_ADDRESS
KEY_PAIR_FILE is the key pair file downloaded when you created your key pair on AWS. If you uploaded your ssh’s default pubkey (e.g. ~/.ssh/id_rsa.pub), you can ignore the -i argument and simply use ssh ubuntu@AWS_VM_PUBLIC_ADDRESS
AWS_VM_PUBLIC_ADDRESS is the public address of the VM running NKN Full Node, which you can find from your EC2 console.
Example: ssh -i nkn_node_keypair.pem ubuntu@ec2–1–2–3–4.compute-1.amazonaws.com
2.) Once you are logged in as ubuntu, change directory to the nkn directory where wallet.json and wallet.pswd files are located:
cd /home/nkn/nkn-commercial/services/nkn-node
3.) Copy and paste the contents of wallet.json and wallet.pswd files to a txt file on your local computer as backup using the following commands:
sudo cat wallet.jsonsudo cat wallet.pswd
Example:
ubuntu@ip-172–31–6–239:/home/nkn/nkn-commercial/services/nkn-node$ sudo cat wallet.json

{“PasswordHash”:”473cf1faffbfbca01f23ca81f8a6b22c977088121cbe243755aa53fb26780e24",”IV”:”0953e70e6acebec746ac6321a52efb87",”MasterKey”:”08695141d3ea038abf62be56025e4021128048fdbc589fe956ad8f07b939305b”,”Version”:”0.0.1",”Address”:”NKNCNDETCtf6N3s4L94FtfJoNYJJmxFZtx”,”ProgramHash”:”65caca2efbcc9e820e63fc8745425ac4f22c5e92",”PrivateKeyEncrypted”:”ff5387b1ba322275123b7479c43449ff24b3e86bca5359a0dbbe472a1b3e422e”,”ContractData”:”232102d8a0488e21064b49a8bf67f4c2c0cad67f8e84c3f6c9295e38177437fbd3932fac010065caca2efbcc9e820e63fc8745425ac4f22c5e92"}ubuntu@ip-172–31–6–239:/home/nkn/nkn-commercial/services/nkn-node$

ubuntu@ip-172–31–6–239:/home/nkn/nkn-commercial/services/nkn-node$ sudo cat wallet.pswd

fqRTYLValQeYDZpz/HubONc3ipi2sE53
Using your favorite text editor, copy the entire contents of wallet.json starting from and including the open bracket “{“ to the closed bracket “}” to a txt file called wallet.json. You might need to remove unnecessary line breaks between lines, so everything is one continuous paragraph.
Next copy the entire contents of wallet.pswd to a text file called wallet.pswd on your local machine.
To test if they are correct, please use https://wallet.nkn.org to open backed-up wallet.json and password. You now have backed up both wallet.json and wallet.pswd from your NKN Full Node!.